


HTML Combobox is mainly used for building forms in HTML. In which users are able to select an option from the list as per their preference. It is formed with a select element and input type=”text” element. The functionality of the Combobox is as same as a select tag. It’s also having a
Combobox is the HTML element that can easily support all kinds of browsers. It works as the latest form of objects as a Combobox for filling data through options in a given textfield.
Syntax of?Combobox in HTML
As we know, Combobox is a combination of
Code for this Syntax is as follows:
<input type=text list=value>
<datalist>
<option>content</option>
<option>content</option>
<option>content</option>
<option>content</option>
<option>content</option>
</datalist>
- In the above syntax, the input type is an element that will create input text where we can take input from the user and show it. This input value is going to select through
- With the above syntax, one can add javascript code to do more functionality with the Combobox element. A function like onChange can choose an option from the selection list as per user preference.
- Once the user selects the option, it will remain as shown on the output screen.
Code for this Syntax is as follows:
<input type="text" id="demo" name="comboboxdemo"/>
<select name=" optionlist " onChange="combo(this, 'demo')">
<option>option 1</option>
<option>option 2</option>
<option>option 3</option>
<option> option 4 </option>
<option> option 5 </option>
</select>
Javascript
var example = listdemo ld.selectedIndex;
var demo = optionlist.options[example].innerHTML;
var demo = optionlist.options[example] .value;
Examples of?Combobox in HTML
Here are the examples of combobox in html as follows:
Example #1
Code:
<html>
<head>
<title>Example of Combobox</title>
</head>
<style>
.combo{
padding:10px;
}
</style>
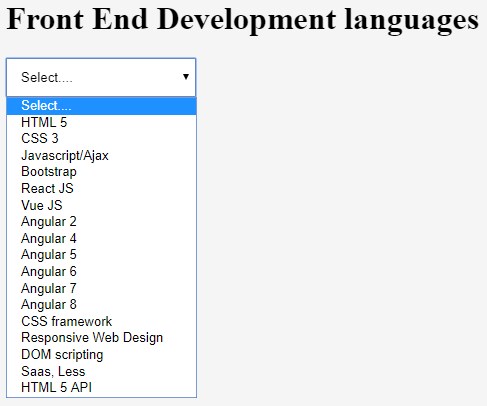
<h1>Front End Development languages</h1>
<body>
<select class="combo">
<option value="Select">Select....</option>
<option value="html">HTML 5</option>
<option value="css">CSS 3</option>
<option value="javascript">Javascript/Ajax</option>
<option value="bootstrap">Bootstrap</option>
<option value="react">React JS</option>
<option value="vue">Vue JS</option>
<option value="2">Angular 2</option>
<option value="4">Angular 4</option>
<option value="5">Angular 5</option>
<option value="6">Angular 6</option>
<option value="7">Angular 7</option>
<option value="8">Angular 8</option>
<option value="CSS fw">CSS framework</option>
<option value="rw">Responsive Web Design</option>
<option value="dom">DOM scripting</option>
<option value="preprocessors">Saas, Less</option>
<option value="api">HTML 5 API</option></select>
</body>
</html>
Output:
Example #2
Code:
<!DOCTYPE html>
<html>
<body>
<h2>Combobox as a form element</h2>
<p>As we all know combobox is the combination of the Select tag and Form element. Here we are going to create same thing in which we are creating combolist in which user can select option as per their choice and this option will redirect to the that particular option so It can be able to open new form using this option .</p>
<form action="C:\Users\Sonali\Desktop\HTML files\Dropdownlist.html">
<input list="html_elements" name="web_language">
<datalist id="html_elements">
<option value="Anchor_tag"> </option>
<option value="Aside _tag"> </option>
<option value="dragdrop">? </option>
<option value="Dropdownlist">? </option>
<option value="Font_tag"></option>
<option value="Block_elements"> </option>
<option value="Blockquote"> </option>
<option value="Colsapn"> </option>
<option value="inline_style"> </option>
<option value="Kbd"></option>
<option value="Meta_tags"> </option>
<option value="Quotation"> </option>
<option value="Table_background"> </option>
<option value="Table_border"> </option>
<option value="Caption"> </option>
<option value="Select tag"> </option>
</datalist>
<input type="submit">
</form>
</body>
</html>
<!--HTML Form Code -->
<!DOCTYPE html>
<html>
<head>
<style>
.dropdownbtn {
background-color: lightgreen;
color: white;
padding: 12px;
font-size: 12px;
}
.dropdowndemo{
position:fixed;
display: block;
}
.dropdownlist-content {
display: none;
position: absolute;
background-color: deepskyblue;
min-width: 120px;
z-index: 1;
}
.dropdownlist-content a {
color:black;
padding: 14px 18px;
display: block;
}
.dropdownlist-content a:hover {background-color: lightcyan;}
.dropdowndemo:hover .dropdownlist-content {display: block;}
.dropdowndemo:hover .dropdownbtn {background-color: palevioletred;}
</style>
</head>
<body>
<div class="dropdowndemo">
<button class="dropdownbtn">HTML forms Element</button>
<div class="dropdownlist-content">
<a href="#">Anchor_tag</a>
<a href="#">Aside _tag</a>
<a href="#">dragdropdown</a>
<a href="#">Font_tag</a>
<a href="#">Block_elements</a>
<a href="#">Blockquote</a>
<a href="#">Colsapn</a>
<a href="#">inline_style</a>
<a href="#">Kbd</a>
<a href="#">Meta_tags</a>
<a href="#">Quotation</a>
<a href="#">Table_background</a>
<a href="#">Table_border</a>
<a href="#">Caption</a>
<a href="#">Select tag</a>
</div>
</div>
</body>
</html>
Output:

After selecting an option from the list, it will link to the attached form or webpage. And after clicking on submit value, this shows showing form with an element as follows:

Example #3
Code :
<!—Main page-->
<!DOCTYPE html>
<html>
<body>
<h2>Student Details</h2>
<form action="C:\Users\Sonali\Desktop\HTML files\combodemo.html">
<input list="stud" name="demo">
<datalist id="stud">
<option value="Student Details"> </option>
<option value="Registration"> </option>
</datalist>
<input type="submit">
</form>
</body>
</html>
<!—Registration form code-->
<html>
<head>
<title>Student Details</title>
<style>
h3{
text-align: center;
}
table{
color:white;
background-color:chocolate;
border-collapse: collapse;
border: 2px solid black;
}
table.inner{
border: 0px
}
</style>
</head>
<body>
<h3>STUDENT REGISTRATION FORM</h3>
<form>
<table align="center" cellpadding = "6">
<tr>
<td>FIRST NAME</td>
<td><input type="text" name="First_Name"/>
</td>
</tr>
<tr>
<td>LAST NAME</td>
<td><input type="text" name="Last_Name"/>
</td>
</tr>
<tr>
<td>DATE OF BIRTH</td>
<td><input type="date" name="Birth_date" /></td>
</tr>
<tr>
<td>EMAIL ID</td>
<td><input type="text" name="Email_Id" maxlength="100" /></td>
</tr>
<tr>
<td>MOBILE NUMBER</td>
<td>
<input type="text" name="Mobile_Number" maxlength="10" />
</td>
</tr>
<tr>
<td>GENDER</td>
<td>
Male <input type="radio" name="Gender" value="Male" />
Female <input type="radio" name="Gender" value="Female" />
Transgender <input type="radio" name="Gender" value="Transgender" />
</td>
</tr>
<tr>
<td>CITY</td>
<td><input type="text" name="City" maxlength="20" />
</td>
</tr>
<tr>
<td>PINCODE</td>
<td><input type="text" name="pincode"? />
</td>
</tr>
<tr>
<td>STATE</td>
<td><input type="text" name="State" />
</td>
</tr>
<tr>
<td>COUNTRY</td>
<td><input type="text" name="Country" value="India" readonly="readonly" /></td>
</tr>
<tr>
<td>HOBBIES <br /><br /><br /></td>
<td>
Writing
<input type="checkbox" name="Hobby_1" value="Writing" />
Sketching
<input type="checkbox" name="Hobby_2" value="Designing" />
Designing
<input type="checkbox" name="Hobby_3" value="Cooking" />
<br />
Others
<input type="checkbox" name="Hobby_4" value="Other">
<input type="text" name="Other_Hobby" maxlength="30" />
</td>
</tr>
<tr>
<td>Percentage</td>
<td><input type="text" name="percentage"/ maxlength="2" placeholder="marks in %"></td>
</tr>
<tr>
<td colspan="2" align="center">
<input type="submit" value="Submit">
<input type="reset" value="Reset">
</td>
</tr>
</table>
</form>
</body>
</html>
Output:

Conclusion
HTML Combobox is one of the most important elements in web designing to create a selection list. The latest browsers use it most commonly. This is made up of a combination of tag for selecting the appropriate option from the list and < input type=”text”> element to store input.
The above is the detailed content of Combobox in HTML. For more information, please follow other related articles on the PHP Chinese website!

Hot AI Tools

Undress AI Tool
Undress images for free

Undresser.AI Undress
AI-powered app for creating realistic nude photos

AI Clothes Remover
Online AI tool for removing clothes from photos.

Clothoff.io
AI clothes remover

Video Face Swap
Swap faces in any video effortlessly with our completely free AI face swap tool!

Hot Article
Hot Tools

Notepad++7.3.1
Easy-to-use and free code editor

SublimeText3 Chinese version
Chinese version, very easy to use

Zend Studio 13.0.1
Powerful PHP integrated development environment

Dreamweaver CS6
Visual web development tools

SublimeText3 Mac version
God-level code editing software (SublimeText3)
Hot Topics


 What are the essential HTML elements for structuring a webpage?
Jul 03, 2025 am 02:34 AM
What are the essential HTML elements for structuring a webpage?
Jul 03, 2025 am 02:34 AM
The web page structure needs to be supported by core HTML elements. 1. The overall structure of the page is composed of , , which is the root element, which stores meta information and displays the content; 2. The content organization relies on title (-), paragraph () and block tags (such as ,) to improve organizational structure and SEO; 3. Navigation is implemented through and implemented, commonly used organizations are linked and supplemented with aria-current attribute to enhance accessibility; 4. Form interaction involves , , and , to ensure the complete user input and submission functions. Proper use of these elements can improve page clarity, maintenance and search engine optimization.
 Handling reconnections and errors with HTML5 Server-Sent Events.
Jul 03, 2025 am 02:28 AM
Handling reconnections and errors with HTML5 Server-Sent Events.
Jul 03, 2025 am 02:28 AM
When using HTML5SSE, the methods to deal with reconnection and errors include: 1. Understand the default reconnection mechanism. EventSource retrys 3 seconds after the connection is interrupted by default. You can customize the interval through the retry field; 2. Listen to the error event to deal with connection failure or parsing errors, distinguish error types and execute corresponding logic, such as network problems relying on automatic reconnection, server errors manually delay reconnection, and authentication failure refresh token; 3. Actively control the reconnection logic, such as manually closing and rebuilding the connection, setting the maximum number of retry times, combining navigator.onLine to judge network status to optimize the retry strategy. These measures can improve application stability and user experience.
 Declaring the correct HTML5 doctype for modern pages.
Jul 03, 2025 am 02:35 AM
Declaring the correct HTML5 doctype for modern pages.
Jul 03, 2025 am 02:35 AM
Doctype is a statement that tells the browser which HTML standard to use to parse the page. Modern web pages only need to be written at the beginning of the HTML file. Its function is to ensure that the browser renders the page in standard mode rather than weird mode, and must be located on the first line, with no spaces or comments in front of it; there is only one correct way to write it, and it is not recommended to use old versions or other variants; other such as charset, viewport, etc. should be placed in part.
 Implementing client-side form validation using HTML attributes.
Jul 03, 2025 am 02:31 AM
Implementing client-side form validation using HTML attributes.
Jul 03, 2025 am 02:31 AM
Client-sideformvalidationcanbedonewithoutJavaScriptbyusingHTMLattributes.1)Userequiredtoenforcemandatoryfields.2)ValidateemailsandURLswithtypeattributeslikeemailorurl,orusepatternwithregexforcustomformats.3)Limitvaluesusingmin,max,minlength,andmaxlen
 How to group options within a select dropdown using html?
Jul 04, 2025 am 03:16 AM
How to group options within a select dropdown using html?
Jul 04, 2025 am 03:16 AM
Use tags in HTML to group options in the drop-down menu. The specific method is to wrap a group of elements and define the group name through the label attribute, such as: 1. Contains options such as apples, bananas, oranges, etc.; 2. Contains options such as carrots, broccoli, etc.; 3. Each is an independent group, and the options within the group are automatically indented. Notes include: ① No nesting is supported; ② The entire group can be disabled through the disabled attribute; ③ The style is restricted and needs to be beautified in combination with CSS or third-party libraries; plug-ins such as Select2 can be used to enhance functions.
 Integrating CSS and JavaScript effectively with HTML5 structure.
Jul 12, 2025 am 03:01 AM
Integrating CSS and JavaScript effectively with HTML5 structure.
Jul 12, 2025 am 03:01 AM
HTML5, CSS and JavaScript should be efficiently combined with semantic tags, reasonable loading order and decoupling design. 1. Use HTML5 semantic tags, such as improving structural clarity and maintainability, which is conducive to SEO and barrier-free access; 2. CSS should be placed in, use external files and split by module to avoid inline styles and delayed loading problems; 3. JavaScript is recommended to be introduced in front, and use defer or async to load asynchronously to avoid blocking rendering; 4. Reduce strong dependence between the three, drive behavior through data-* attributes and class name control status, and improve collaboration efficiency through unified naming specifications. These methods can effectively optimize page performance and collaborate with teams.
 Implementing Clickable Buttons Using the HTML button Element
Jul 07, 2025 am 02:31 AM
Implementing Clickable Buttons Using the HTML button Element
Jul 07, 2025 am 02:31 AM
To use HTML button elements to achieve clickable buttons, you must first master its basic usage and common precautions. 1. Create buttons with tags and define behaviors through type attributes (such as button, submit, reset), which is submitted by default; 2. Add interactive functions through JavaScript, which can be written inline or bind event listeners through ID to improve maintenance; 3. Use CSS to customize styles, including background color, border, rounded corners and hover/active status effects to enhance user experience; 4. Pay attention to common problems: make sure that the disabled attribute is not enabled, JS events are correctly bound, layout occlusion, and use the help of developer tools to troubleshoot exceptions. Master this
 Submitting Form Data Using New HTML5 Methods (FormData)
Jul 08, 2025 am 02:28 AM
Submitting Form Data Using New HTML5 Methods (FormData)
Jul 08, 2025 am 02:28 AM
It is more convenient to submit form data using HTML5's FormData API. 1. It can automatically collect form fields with name attribute or manually add data; 2. It supports submission in multipart/form-data format through fetch or XMLHttpRequest, which is suitable for file upload; 3. When processing files, you only need to append the file to FormData and send a request; 4. Note that the same name field will be overwritten, and JSON conversion and no nesting structure need to be handled.
