


Seamless File Sharing Between Mac and Windows: A Step-by-Step Guide
Sharing files across Mac and Windows devices shouldn't be a complex task. With a few simple configuration changes, you can establish a robust home network for efficient file transfer.
Why Share Files Directly?
You likely already know how to share files between Macs or between a Mac and a Linux system. However, since Windows and macOS are the dominant operating systems, many users have both. Direct network sharing offers a faster and more secure alternative to cloud services or external drives, eliminating extra steps and potential hassles.
Before you begin, ensure both your Mac and Windows computers are connected to the same network (Wi-Fi or Ethernet).
Mac Network Configuration:
Verify your Mac's network connection via the Wi-Fi status in the menu bar or by navigating to System Settings > Network.

Windows Network Configuration:
On your Windows machine, open Settings > Network & Internet and check your connection status under Wi-Fi or Ethernet.

Enabling File Sharing on macOS:
- Access System Settings > General > Sharing and activate "File Sharing."
- Click the small icon next to the toggle to open Shared Folders settings.
- Select "Options," ensure SMB File Sharing is enabled, and authorize your account for Windows file sharing.
- Click "Done."

Managing Shared Folders and User Access on macOS:
- In the Shared Folders window, click " " to add folders. Configure access permissions (Read Only or Read & Write) for each user.
- Use the " " and "–" buttons to add or remove users.


Accessing macOS Shared Folders from Windows:
- Open File Explorer and select "Network." Your Mac should appear.
- Open the desired shared folder and enter your Mac credentials. (Consider selecting "Remember my Credentials.")
- If your Mac isn't visible, enter its IP address in the address bar. Find the IP address in System Information (Apple menu > System Information > Network > IPv4 Address). For improved network visibility, consider installing wssd-native.

Enabling File Sharing on Windows:
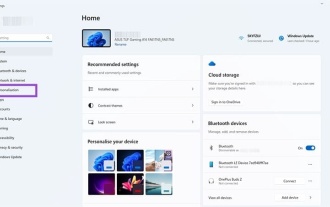
- Open Settings (Win I) and navigate to Network & Internet > Advanced network settings.
- Select "Advanced sharing settings," then enable "Network discovery" and "File and printer sharing."
- Optionally disable "Password-protected sharing" if your network is secure.

Sharing Folders on Windows:
- Right-click the folder you wish to share in File Explorer and select "Properties."
- Go to the "Sharing" tab, click "Share," select the user with access, and click "Share" again. Click "Done."

Accessing Windows Shared Folders from macOS:
- Open Finder, select "Network," and locate your Windows machine.
- Click "Connect As" and enter your Windows credentials.

Conclusion:
You've successfully configured file sharing between your Mac and Windows devices! Enjoy the streamlined workflow and enhanced productivity of a seamlessly connected home network. For wireless sharing options across multiple platforms, explore LocalSend.
The above is the detailed content of How to Share Files Between Mac and Windows. For more information, please follow other related articles on the PHP Chinese website!

Hot AI Tools

Undress AI Tool
Undress images for free

Undresser.AI Undress
AI-powered app for creating realistic nude photos

AI Clothes Remover
Online AI tool for removing clothes from photos.

Clothoff.io
AI clothes remover

Video Face Swap
Swap faces in any video effortlessly with our completely free AI face swap tool!

Hot Article
Hot Tools

Notepad++7.3.1
Easy-to-use and free code editor

SublimeText3 Chinese version
Chinese version, very easy to use

Zend Studio 13.0.1
Powerful PHP integrated development environment

Dreamweaver CS6
Visual web development tools

SublimeText3 Mac version
God-level code editing software (SublimeText3)
Hot Topics
 1794
1794
 16
1740
56
1590
29
1468
72
267
587
16
1740
56
1590
29
1468
72
267
587

 How to uninstall programs in Windows 11?
Jun 30, 2025 am 12:41 AM
How to uninstall programs in Windows 11?
Jun 30, 2025 am 12:41 AM
There are three main ways to uninstall programs on Windows 11: 1. Uninstall through "Settings", open the "Settings" > "Apps" > "Installed Applications", select the program and click "Uninstall", which is suitable for most users; 2. Use the control panel, search and enter "Control Panel" > "Programs and Functions", right-click the program and select "Uninstall", which is suitable for users who are accustomed to traditional interfaces; 3. Use third-party tools such as RevoUninstaller to clean up more thoroughly, but pay attention to the download source and operation risks, and novices can give priority to using the system's own methods.
 How to run an app as an administrator in Windows?
Jul 01, 2025 am 01:05 AM
How to run an app as an administrator in Windows?
Jul 01, 2025 am 01:05 AM
To run programs as administrator, you can use Windows' own functions: 1. Right-click the menu to select "Run as administrator", which is suitable for temporary privilege hike scenarios; 2. Create a shortcut and check "Run as administrator" to achieve automatic privilege hike start; 3. Use the task scheduler to configure automated tasks, suitable for running programs that require permissions on a scheduled or background basis, pay attention to setting details such as path changes and permission checks.
 How to activate Windows 11?
Jun 28, 2025 am 12:32 AM
How to activate Windows 11?
Jun 28, 2025 am 12:32 AM
The activation method of Windows 11 depends on the system source and is divided into two types: automatic activation of digital licenses and manual input of product keys. 1. If you purchase a computer using a genuine channel or bind a digital license, connect to the network and log in to a Microsoft account, the system will automatically activate. You can check the status in "Settings → System → About → Activation"; 2. If you use a retail version or OEM key, you need to enter the activation page and manually enter the key, and the key must match the system version; 3. If the activation fails, you should check whether the key is reused, whether the network is normal, running the troubleshooting tool, or try to log in to the Microsoft account again, but it still cannot be resolved. You can contact Microsoft customer service.
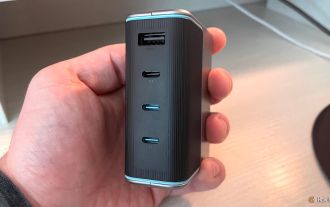 CUKTECH 15 GaN Charger 140W Review: Everything Portable Laptop Power Should Be
Jun 30, 2025 pm 09:09 PM
CUKTECH 15 GaN Charger 140W Review: Everything Portable Laptop Power Should Be
Jun 30, 2025 pm 09:09 PM
The CUKTECH 15 GaN Charger 140W is the type of tech accessory everyone should own. Perfect for charging a laptop or a bunch of mobile devices at once, the GaN internals make this a heavier charger than others on the market, but a bit of extra bulk is
 Why Overclocking Isn't Useful Anymore
Jul 01, 2025 am 03:03 AM
Why Overclocking Isn't Useful Anymore
Jul 01, 2025 am 03:03 AM
RelatedWhat Clock Speed Means and Why It’s Not the Only Factor in Choosing a CPUTick, tock, is that a clock?PostsFor years, people have tried to get better performance from CPUs (and other PC parts) by overclocking them—running the clock speed higher
 Windows 11 slow boot time fix
Jul 04, 2025 am 02:04 AM
Windows 11 slow boot time fix
Jul 04, 2025 am 02:04 AM
The problem of slow booting can be solved by the following methods: 1. Check and disable unnecessary booting programs; 2. Turn off the quick boot function; 3. Update the driver and check disk health; 4. Adjust the number of processor cores (only for advanced users). For Windows 11 systems, first, the default self-start software such as QQ and WeChat are disabled through the task manager to improve the startup speed; if you use dual systems or old hardware, you can enter the power option to turn off the quick boot function; second, use the device manager to update the driver and run the chkdsk command to fix disk errors, and it is recommended to replace the mechanical hard disk with SSD; for multi-core CPU users, the kernel parameters can be adjusted through bcdedit and msconfig to optimize the startup efficiency. Most cases can be corrected by basic investigation
 How to Change Font Color on Desktop Icons (Windows 11)
Jul 07, 2025 pm 12:07 PM
How to Change Font Color on Desktop Icons (Windows 11)
Jul 07, 2025 pm 12:07 PM
If you're having trouble reading your desktop icons' text or simply want to personalize your desktop look, you may be looking for a way to change the font color on desktop icons in Windows 11. Unfortunately, Windows 11 doesn't offer an easy built-in
 How to uninstall a Windows update that is causing problems?
Jul 01, 2025 am 12:48 AM
How to uninstall a Windows update that is causing problems?
Jul 01, 2025 am 12:48 AM
Uninstalling the problematic Windows update can solve the system instability problem. The specific steps are as follows: 1. Find the list of recently installed updates through "Settings" > "Update and Security" > "Windows Update" > "View Update History" and confirm the problem update; 2. Open the control panel, go to "Programs" > "Uninstall Programs" > "View Installed Updates", select the target update and uninstall, and restart it after the operation; 3. If you cannot enter the system, you can boot with the Windows installation USB drive, enter the "Command Prompt" to execute the wusa/uninstall/kb:XXXXXXX command to uninstall the update. Note that cumulative updates may affect multiple patches, and it is recommended to backup in advance
