


To create a basic modal box or pop-up box, first build the structure using HTML, then style it through CSS, and optionally implement interaction using JavaScript. 1. The HTML part includes trigger buttons, modal box containers and contents; 2. CSS is used to set positioning, overlaying and centering effects; 3. JavaScript controls display and hide; 4. Responsive design recommends using percentage width and media queries to adapt to different devices. The whole process is simple and effective and is suitable for most simple scenarios.

A modal or popup box is a common UI element used for displaying content like forms, messages, or images without leaving the current page. Building one with HTML and CSS isn't complicated once you understand the basics of positioning and layering elements.
Basic Structure: HTML Setup
Start with a simple structure using HTML. You'll need a trigger button, the modal container, and the modal content.
<!-- Trigger Button -->
<button id="openModal">Open Modal</button>
<!-- Modal Container -->
<div class="modal" id="modal">
<div class="modal-content">
<span class="close" id="closeBtn">×</span>
<p>This is a modal box.</p>
</div>
</div> This gives you the skeleton. The .modal div wraps everything related to the popup, while .modal-content holds the actual content and close button.
Styling with CSS: Positioning and Overlay
To make it look like a modal, use CSS to create an overlay effect and center the box on screen.
 .modal {
  display: none; /* Hidden by default */
  position: fixed;
  z-index: 1000;
  left: 0;
  top: 0;
  width: 100%;
  height: 100%;
  overflow: auto;
  background-color: rgba(0,0,0,0.5); /* Black overlay with opacity */
}

.modal-content {
  background-color: #fff;
  margin: 5% auto;
  padding: 20px;
  border-radius: 8px;
  width: 70%;
  position: relative;
}-
position: fixedkeeps the modal in place even when scrolling. -
background-color: rgba(0,0,0,0.5)creates a dark semi-transparent background. -
margin: 5% autocenters the modal vertically and horizontally.
Also add some style for the close button:
 .close {
  color: #aaa;
  float: right;
  font-size: 28px;
  font-weight: bold;
  cursor: pointer;
}
Show and Hide with JavaScript (Optional)
If you want interactivity, a bit of JavaScript helps toggle visibility.
 const modal = document.getElementById('modal');
const btn = document.getElementById('openModal');
const span = document.getElementById('closeBtn');

btn.onclick = function() {
  modal.style.display = "block";
}

span.onclick = function() {
  modal.style.display = "none";
}

window.onclick = function(event) {
  if (event.target == modal) {
    modal.style.display = "none";
  }
}- Clicking the button shows the modal.
- Clicking the close button (
×) or outside the modal content hides it again.
You can skip this part if you're only building a static version for design purposes.
Responsive Design Tips
Make sure your modal works well across devices:
- Use percentage-based widths or
max-widthinstead of fixed pixel values. - Add media queries to adjust size or font on smaller screens.
- Ensure touch interactions are smooth — test on mobile browsers.
For example:
 @media (max-width: 600px) {
  .modal-content {
    width: 90%;
    margin: 10% auto;
  }
}
This way, your modal doesn't break on phones or tablets.
That's the core of creating a basic modal or popup box with just HTML and CSS. It's straightforward but effective for most simple use cases. Basically, it comes down to layout, positioning, and handling visibility — whether through JS or other methods.
The above is the detailed content of How to build a modal or popup box CSS tutorial. For more information, please follow other related articles on the PHP Chinese website!

Hot AI Tools

Undress AI Tool
Undress images for free

Undresser.AI Undress
AI-powered app for creating realistic nude photos

AI Clothes Remover
Online AI tool for removing clothes from photos.

Clothoff.io
AI clothes remover

Video Face Swap
Swap faces in any video effortlessly with our completely free AI face swap tool!

Hot Article
Hot Tools

Notepad++7.3.1
Easy-to-use and free code editor

SublimeText3 Chinese version
Chinese version, very easy to use

Zend Studio 13.0.1
Powerful PHP integrated development environment

Dreamweaver CS6
Visual web development tools

SublimeText3 Mac version
God-level code editing software (SublimeText3)
Hot Topics


 What is 'render-blocking CSS'?
Jun 24, 2025 am 12:42 AM
What is 'render-blocking CSS'?
Jun 24, 2025 am 12:42 AM
CSS blocks page rendering because browsers view inline and external CSS as key resources by default, especially with imported stylesheets, header large amounts of inline CSS, and unoptimized media query styles. 1. Extract critical CSS and embed it into HTML; 2. Delay loading non-critical CSS through JavaScript; 3. Use media attributes to optimize loading such as print styles; 4. Compress and merge CSS to reduce requests. It is recommended to use tools to extract key CSS, combine rel="preload" asynchronous loading, and use media delayed loading reasonably to avoid excessive splitting and complex script control.
 How to use Lotties in Figma
Jun 14, 2025 am 10:17 AM
How to use Lotties in Figma
Jun 14, 2025 am 10:17 AM
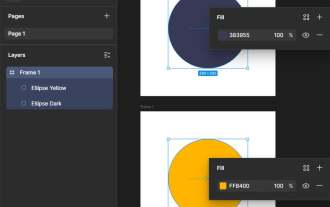
In the following tutorial, I will show you how to create Lottie animations in Figma. We'll use two colorful designs to exmplify how you can animate in Figma, and then I'll show you how to go from Figma to Lottie animations. All you need is a free Fig
 Breaking Boundaries: Building a Tangram Puzzle With (S)CSS
Jun 13, 2025 am 11:33 AM
Breaking Boundaries: Building a Tangram Puzzle With (S)CSS
Jun 13, 2025 am 11:33 AM
We put it to the test and it turns out Sass can replace JavaScript, at least when it comes to low-level logic and puzzle behavior. With nothing but maps, mixins, functions, and a whole lot of math, we managed to bring our Tangram puzzle to life, no J
 External vs. Internal CSS: What's the Best Approach?
Jun 20, 2025 am 12:45 AM
External vs. Internal CSS: What's the Best Approach?
Jun 20, 2025 am 12:45 AM
ThebestapproachforCSSdependsontheproject'sspecificneeds.Forlargerprojects,externalCSSisbetterduetomaintainabilityandreusability;forsmallerprojectsorsingle-pageapplications,internalCSSmightbemoresuitable.It'scrucialtobalanceprojectsize,performanceneed
 Does my CSS must be on lower case?
Jun 19, 2025 am 12:29 AM
Does my CSS must be on lower case?
Jun 19, 2025 am 12:29 AM
No,CSSdoesnothavetobeinlowercase.However,usinglowercaseisrecommendedfor:1)Consistencyandreadability,2)Avoidingerrorsinrelatedtechnologies,3)Potentialperformancebenefits,and4)Improvedcollaborationwithinteams.
 CSS Case Sensitivity: Understanding What Matters
Jun 20, 2025 am 12:09 AM
CSS Case Sensitivity: Understanding What Matters
Jun 20, 2025 am 12:09 AM
CSSismostlycase-insensitive,butURLsandfontfamilynamesarecase-sensitive.1)Propertiesandvalueslikecolor:red;arenotcase-sensitive.2)URLsmustmatchtheserver'scase,e.g.,/images/Logo.png.3)Fontfamilynameslike'OpenSans'mustbeexact.
 What is Autoprefixer and how does it work?
Jul 02, 2025 am 01:15 AM
What is Autoprefixer and how does it work?
Jul 02, 2025 am 01:15 AM
Autoprefixer is a tool that automatically adds vendor prefixes to CSS attributes based on the target browser scope. 1. It solves the problem of manually maintaining prefixes with errors; 2. Work through the PostCSS plug-in form, parse CSS, analyze attributes that need to be prefixed, and generate code according to configuration; 3. The usage steps include installing plug-ins, setting browserslist, and enabling them in the build process; 4. Notes include not manually adding prefixes, keeping configuration updates, prefixes not all attributes, and it is recommended to use them with the preprocessor.
 What are CSS counters?
Jun 19, 2025 am 12:34 AM
What are CSS counters?
Jun 19, 2025 am 12:34 AM
CSScounterscanautomaticallynumbersectionsandlists.1)Usecounter-resettoinitialize,counter-incrementtoincrease,andcounter()orcounters()todisplayvalues.2)CombinewithJavaScriptfordynamiccontenttoensureaccurateupdates.
