
 Web Front-end
HTML Tutorial
ViewPager_html/css_WEB-ITnose implemented by user guide sliding left and right
Web Front-end
HTML Tutorial
ViewPager_html/css_WEB-ITnose implemented by user guide sliding left and right
ViewPager_html/css_WEB-ITnose implemented by user guide sliding left and right
Jun 24, 2016 pm 12:04 PM
Continuing from the previous blog, the previous blog used ImageSwitcher to implement the user guide function, and now uses ViewPager to implement the same function. Look at the code directly:
Layout file activity_main.xml
<RelativeLayout xmlns:android="http://schemas.android.com/apk/res/android" xmlns:tools="http://schemas.android.com/tools" android:layout_width="fill_parent" android:layout_height="fill_parent" tools:context=".MainActivity" > <android.support.v4.view.ViewPager android:id="@+id/viewpager" android:layout_width="fill_parent" android:layout_height="fill_parent"/> <LinearLayout android:id="@+id/dots" android:layout_width="fill_parent" android:layout_height="wrap_content" android:layout_alignParentBottom="true" android:layout_marginBottom="50dp" android:gravity="center_horizontal" android:orientation="horizontal" > </LinearLayout></RelativeLayout>
The switching of ViewPager pages uses small dots to indicate the current number. Page, here the drawable.xml file is used to draw, as follows:
dot_focus.xml
<?xml version="1.0" encoding="utf-8"?> <shape xmlns:android="http://schemas.android.com/apk/res/android" android:shape="oval"> <corners android:radius="5dip" /> <solid android:color="#FF930000" /></shape>dot_nomal.xml
<?xml version="1.0" encoding="utf-8"?> <shape xmlns:android="http://schemas.android.com/apk/res/android" android:shape="oval"> <corners android:radius="5dip" /> <solid android:color="#FF3C3C3C" /></shape>The following code in Activity:
package com.example.viewpagerautoswitch;import java.util.ArrayList;import java.util.List;import android.annotation.SuppressLint;import android.app.Activity;import android.content.Context;import android.os.Bundle;import android.support.v4.view.ViewPager;import android.support.v4.view.ViewPager.OnPageChangeListener;import android.view.View;import android.view.View.OnClickListener;import android.view.ViewGroup.LayoutParams;import android.widget.ImageView;import android.widget.LinearLayout;import android.widget.TextView;import android.widget.Toast;@SuppressLint("HandlerLeak")public class MainActivity extends Activity { private ViewPager mViewPager ; private MyPagerAdapter mViewPagerAdapter ; private LinearLayout mLinearLayout ; private ImageView[] mImageDots ; private Context mContext ; @Override protected void onCreate(Bundle savedInstanceState) { super.onCreate(savedInstanceState); setContentView(R.layout.activity_main); mContext = MainActivity.this ; mViewPager = (ViewPager)findViewById(R.id.viewpager); mLinearLayout = (LinearLayout)findViewById(R.id.dots); initViewPager(getImageItem() ,0); } public void initViewPager(List<ImageView> mList ,int position){ mImageDots = new ImageView[mList.size()]; for(int i=0 ;i<mList.size() ;i++){ ImageView image = new ImageView(mContext); image.setLayoutParams(new LayoutParams(10, 10)); image.setBackgroundResource(R.drawable.dot_nomal); mImageDots[i] = image ; mLinearLayout.addView(image); TextView tv = new TextView(mContext); tv.setLayoutParams(new LayoutParams(20, 10)); mLinearLayout.addView(tv); } mViewPagerAdapter = new MyPagerAdapter(mContext,mList); mViewPager.setOnPageChangeListener(new OnPageChangeListener() { // onPageScrollStateChanged --> onPageSelected --> onPageScrolled -->onPageScrollStateChanged @Override public void onPageSelected(int position) { for(int i=0 ;i<mImageDots.length ;i++){ if(i == position){ mImageDots[i].setBackgroundResource(R.drawable.dot_focus); }else{ mImageDots[i].setBackgroundResource(R.drawable.dot_nomal); } } } @Override public void onPageScrolled(int current_position, float persent, int px) { } @Override public void onPageScrollStateChanged(int state) { } }); mViewPager.setOnClickListener(new OnClickListener() { @Override public void onClick(View view) { } }); mViewPager.setAdapter(mViewPagerAdapter); mViewPager.setCurrentItem(position); mImageDots[position].setBackgroundResource(R.drawable.dot_focus); } public List<ImageView> getImageItem(){ List<ImageView> list = new ArrayList<ImageView>(); ImageView img = new ImageView(mContext); img.setBackgroundResource(R.drawable.img1); list.add(img); img = new ImageView(mContext); img.setBackgroundResource(R.drawable.img2); list.add(img); img = new ImageView(mContext); img.setBackgroundResource(R.drawable.img3); list.add(img); return list ; } @Override public void finish() { super.finish(); }} The difference between ViewPager and ImageSwitcher here is that ViewPager uses Adapter to encapsulate the pages that need to be installed, while ImageSwitcher uses ViewFactory to add them. Installing pictures. Therefore, when using viewPager, you need to integrate PagerAdapter to implement the corresponding interface. As follows: MyPagerAdapter.java
package com.example.viewpagerautoswitch;import java.util.List;import android.content.Context;import android.support.v4.view.PagerAdapter;import android.support.v4.view.ViewPager;import android.view.View;import android.view.ViewGroup;import android.widget.ImageView;public class MyPagerAdapter extends PagerAdapter { private List<ImageView> items ; private Context mContext ; public MyPagerAdapter(Context context,List<ImageView> item){ mContext = context ; items = item ; } @Override public int getCount() { return items == null ? 0 : items.size(); } @Override public boolean isViewFromObject(View view, Object obj) { return view == (View)obj; } @Override public Object instantiateItem (ViewGroup container, int position) { ImageView image = items.get(position); ((ViewPager)container).addView(image, 0); return image; } @Override public void destroyItem (ViewGroup container, int position, Object object) { container.removeView((View)object); } }In this way, the user guide function can be realized. The specific page effect is as follows: The picture shows the second pager In this case, this is a demo on an Android phone. If used on an Android set-top box, the left and right keys can be captured to slide the time.
Sometimes, in the application, it is not just to switch pictures. Maybe this Pager has the meaning of a click event, such as jumping to a certain web page after clicking. , do this! ? Here you can encapsulate your Adapter data, replace the ImageView with the encapsulated data you define, instantiate a View in the instantiateItem() rewritten in the Adapter, and then return it, because the list of initialized Adapter has the original value in MainActivity Data, then when the user clicks on a pager, extract the information represented by the pager, such as a URL link, etc.
In fact, many apps now use the effect of automatic cycle switching. This effect is nothing more than using a timer Handler. You only need to add the following code:
private Timer mTimer ; private void startTimer(){ if(mTimer == null){ mTimer = new Timer(true); } mTimer.schedule(new TimerTask(){ @Override public void run() { mHandler.sendEmptyMessage(0); } }, 1000, 4000) ;// 延遲1秒開始執(zhí)行,循環(huán)執(zhí)行時(shí)間是4秒 } private void stopTimer(){ if(mTimer != null){ mTimer.cancel() ; mTimer = null ; } } @SuppressLint("HandlerLeak") Handler mHandler = new Handler(){ public void handleMessage(android.os.Message msg) { if(msg.what == 0){ int mViewPagerCurrentIndex = mViewPager.getCurrentItem(); mViewPagerCurrentIndex = (++mViewPagerCurrentIndex) % mViewPager.getAdapter().getCount() ; mViewPager.setCurrentItem(mViewPagerCurrentIndex, true); } }; }; This code provides startTimer() and stopTimer() switches for starting and stopping automatic loop switching. Through these two methods, you can operate more specifically on whether ViewPager needs to automatically switch. In addition, the automatic switching of ImageSwitcher can also be controlled using this code.

Hot AI Tools

Undress AI Tool
Undress images for free

Undresser.AI Undress
AI-powered app for creating realistic nude photos

AI Clothes Remover
Online AI tool for removing clothes from photos.

Clothoff.io
AI clothes remover

Video Face Swap
Swap faces in any video effortlessly with our completely free AI face swap tool!

Hot Article
Hot Tools

Notepad++7.3.1
Easy-to-use and free code editor

SublimeText3 Chinese version
Chinese version, very easy to use

Zend Studio 13.0.1
Powerful PHP integrated development environment

Dreamweaver CS6
Visual web development tools

SublimeText3 Mac version
God-level code editing software (SublimeText3)
Hot Topics


 How to use Xiaohongshu account to find users? Can I find my mobile phone number?
Mar 22, 2024 am 08:40 AM
How to use Xiaohongshu account to find users? Can I find my mobile phone number?
Mar 22, 2024 am 08:40 AM
With the rapid development of social media, Xiaohongshu has become one of the most popular social platforms. Users can create a Xiaohongshu account to show their personal identity and communicate and interact with other users. If you need to find a user’s Xiaohongshu number, you can follow these simple steps. 1. How to use Xiaohongshu account to find users? 1. Open the Xiaohongshu APP, click the "Discover" button in the lower right corner, and then select the "Notes" option. 2. In the note list, find the note posted by the user you want to find. Click to enter the note details page. 3. On the note details page, click the "Follow" button below the user's avatar to enter the user's personal homepage. 4. In the upper right corner of the user's personal homepage, click the three-dot button and select "Personal Information"
 How to copy a page in Word
Feb 20, 2024 am 10:09 AM
How to copy a page in Word
Feb 20, 2024 am 10:09 AM
Want to copy a page in Microsoft Word and keep the formatting intact? This is a smart idea because duplicating pages in Word can be a useful time-saving technique when you want to create multiple copies of a specific document layout or format. This guide will walk you through the step-by-step process of copying pages in Word, whether you are creating a template or copying a specific page in a document. These simple instructions are designed to help you easily recreate your page without having to start from scratch. Why copy pages in Microsoft Word? There are several reasons why copying pages in Word is very beneficial: When you have a document with a specific layout or format that you want to copy. Unlike recreating the entire page from scratch
 Log in to Ubuntu as superuser
Mar 20, 2024 am 10:55 AM
Log in to Ubuntu as superuser
Mar 20, 2024 am 10:55 AM
In Ubuntu systems, the root user is usually disabled. To activate the root user, you can use the passwd command to set a password and then use the su- command to log in as root. The root user is a user with unrestricted system administrative rights. He has permissions to access and modify files, user management, software installation and removal, and system configuration changes. There are obvious differences between the root user and ordinary users. The root user has the highest authority and broader control rights in the system. The root user can execute important system commands and edit system files, which ordinary users cannot do. In this guide, I'll explore the Ubuntu root user, how to log in as root, and how it differs from a normal user. Notice
 Tutorial: How to delete a normal user account in Ubuntu system?
Jan 02, 2024 pm 12:34 PM
Tutorial: How to delete a normal user account in Ubuntu system?
Jan 02, 2024 pm 12:34 PM
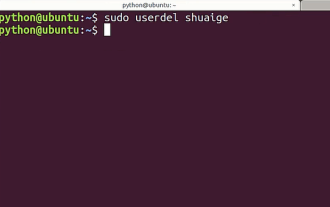
Many users have been added to the Ubuntu system. I want to delete the users that are no longer in use. How to delete them? Let’s take a look at the detailed tutorial below. 1. Open the terminal command line and use the userdel command to delete the specified user. Be sure to add the sudo permission command, as shown in the figure below. 2. When deleting, be sure to be in the administrator directory. Ordinary users do not have this permission. , as shown in the figure below 3. After the delete command is executed, how to judge whether it has been truly deleted? Next we use the cat command to open the passwd file, as shown in the figure below 4. We see that the deleted user information is no longer in the passwd file, which proves that the user has been deleted, as shown in the figure below 5. Then we enter the home file
 Windows 11 KB5031455 fails to install, causing other issues for some users
Nov 01, 2023 am 08:17 AM
Windows 11 KB5031455 fails to install, causing other issues for some users
Nov 01, 2023 am 08:17 AM
Microsoft began rolling out KB2 to the public as an optional update for Windows 503145511H22 or later. This is the first update to enable Windows 11 Moment 4 features by default, including Windows Copilot in supported areas, preview support for items in the Start menu, ungrouping of the taskbar, and more. Additionally, it fixes several Windows 11 bugs, including potential performance issues that caused memory leaks. But ironically, the optional update for September 2023 will be a disaster for users trying to install the update, or even for those who have already installed it. Many users will not install this Wi
 What is sudo and why is it important?
Feb 21, 2024 pm 07:01 PM
What is sudo and why is it important?
Feb 21, 2024 pm 07:01 PM
sudo (superuser execution) is a key command in Linux and Unix systems that allows ordinary users to run specific commands with root privileges. The function of sudo is mainly reflected in the following aspects: Providing permission control: sudo achieves strict control over system resources and sensitive operations by authorizing users to temporarily obtain superuser permissions. Ordinary users can only obtain temporary privileges through sudo when needed, and do not need to log in as superuser all the time. Improved security: By using sudo, you can avoid using the root account during routine operations. Using the root account for all operations may lead to unexpected system damage, as any mistaken or careless operation will have full permissions. and
 How to quickly refresh a web page?
Feb 18, 2024 pm 01:14 PM
How to quickly refresh a web page?
Feb 18, 2024 pm 01:14 PM
Page refresh is very common in our daily network use. When we visit a web page, we sometimes encounter some problems, such as the web page not loading or displaying abnormally, etc. At this time, we usually choose to refresh the page to solve the problem, so how to refresh the page quickly? Let’s discuss the shortcut keys for page refresh. The page refresh shortcut key is a method to quickly refresh the current web page through keyboard operations. In different operating systems and browsers, the shortcut keys for page refresh may be different. Below we use the common W
 What should I do if my mobile phone screen is hard to slide and dry?
Dec 04, 2023 pm 03:51 PM
What should I do if my mobile phone screen is hard to slide and dry?
Dec 04, 2023 pm 03:51 PM
Solutions for mobile phone screens that are difficult to slide and dry: 1. Humidify the screen; 2. Clean the screen regularly; 3. Increase the sliding strength of your fingers; 4. Use mobile phone screen protectors; 5. Replace protective covers; 6. Keep hands moist; 7. , handle it cleanly when applying the film; 8. Use lubricant; 9. Use gloves; 10. Adjust the screen brightness; 11. Replace the mobile phone. Detailed introduction: 1. Humidify the screen, place a humidifier next to the screen or spray some water to increase the humidity in the air, thereby reducing the dryness of the screen; 2. Clean the screen regularly, use professional screen cleaner, etc.
