

How to use the Hyperf framework for interface document generation
Oct 25, 2023 pm 12:07 PM
How to use the Hyperf framework for interface document generation
With the rapid development of web applications, the writing and maintenance of interface documents has become more and more important. Interface documents can help developers better understand and use APIs, improve development efficiency and collaborative development capabilities. In daily development, we often need to manually write and update interface documents, which is a relatively tedious and error-prone task. In order to solve this problem, we can use the automatic tools of the Hyperf framework to generate interface documents through annotations.
Hyperf framework is a high-performance framework based on Swoole and Hyperf components. It provides a series of annotations to simplify the development process. Among them, we can use the "@RequestMapping" annotation to define the interface, and use the "@Api" annotation to generate the interface document.
First, we need to introduce the Hyperf framework and corresponding dependencies into the project. Add the following content to the composer.json file:
{
    "require": {
        "hyperf/http-server": "^2.0",
        "phpstan/phpstan": "^0.9.0",
        "phpstan/phpstan-strict-rules": "^0.9.0",
        "symfony/console": "^5.0"
    }
}
and then execute the composer update command to install the dependencies.
Next, we create a controller to define the interface. Create an IndexController.php file in the app/Controller directory. The code is as follows:
<?php

declare(strict_types=1);

namespace AppController;

use HyperfHttpServerAnnotationController;
use HyperfHttpServerAnnotationRequestMapping;
use HyperfDiAnnotationInject;
use HyperfContractStdoutLoggerInterface;
use AppServiceHelloService;

/**
 * @Controller()
 * @Api(name="Hello接口")
 */
class IndexController
{
    /**
     * @Inject()
     * @var HelloService
     */
    private $helloService;

    /**
     * @RequestMapping(path="/hello/{name}", methods="get")
     * @param string $name
     */
    public function hello(string $name)
    {
        return $this->helloService->sayHello($name);
    }
}
In the above code, we define an IndexControllerController, and uses the @RequestMapping annotation on the hello method to define the interface. In addition, we also used the @Api annotation to generate the interface document, and used the @Inject annotation to inject the HelloService service.
Next, we can use the custom command of the Hyperf framework to generate the interface document. Create a doc directory in the project root directory and create a generate.php file in it. The code is as follows:
<?php

declare(strict_types=1);

use HyperfCommandCommand as HyperfCommand;
use HyperfCommandAnnotationCommand;
use PsrContainerContainerInterface;
use HyperfApiDocCommandGenerateApiDocCommand;

/**
 * @Command
 */
class DocCommand extends HyperfCommand
{
    /**
     * @var ContainerInterface
     */
    protected $container;

    public function __construct(ContainerInterface $container)
    {
        $this->container = $container;

        parent::__construct('doc:generate');
    }

    public function configure()
    {
        parent::configure();
        $this->setDescription('Generate api doc for the project');
    }

    public function handle()
    {
        $command = new ApiDocCommand($this->container);
        $command->setOutput($this->output);
        $command->setInput($this->input);
        return $command->handle();
    }
}
In the above code, we create A custom DocCommand command is created, and the ApiDocCommand command provided by the Hyperf framework is called in the handle method to generate the interface document.
Finally, we execute the php doc/generate.php command in the terminal to generate the interface document. After successful execution, we can find the generated interface document in the public directory under the project root directory.
Through the above steps, we successfully generated the interface document using the Hyperf framework. By defining interfaces through annotations, we can write documents more concisely and reduce the workload of manually writing documents. At the same time, the custom commands provided by the Hyperf framework also make the document generation process more convenient.
In summary, using the Hyperf framework to generate interface documents not only improves development efficiency, but also ensures the accuracy and consistency of the documents. I hope this article can be helpful to everyone when using the Hyperf framework to generate interface documents.
Code sample: https://github.com/xxx/xxx
The above is the detailed content of How to use the Hyperf framework for interface document generation. For more information, please follow other related articles on the PHP Chinese website!

Hot AI Tools

Undress AI Tool
Undress images for free

Undresser.AI Undress
AI-powered app for creating realistic nude photos

AI Clothes Remover
Online AI tool for removing clothes from photos.

Clothoff.io
AI clothes remover

Video Face Swap
Swap faces in any video effortlessly with our completely free AI face swap tool!

Hot Article
Hot Tools

Notepad++7.3.1
Easy-to-use and free code editor

SublimeText3 Chinese version
Chinese version, very easy to use

Zend Studio 13.0.1
Powerful PHP integrated development environment

Dreamweaver CS6
Visual web development tools

SublimeText3 Mac version
God-level code editing software (SublimeText3)
Hot Topics


 How to use DirectX repair tool? Detailed usage of DirectX repair tool
Mar 15, 2024 am 08:31 AM
How to use DirectX repair tool? Detailed usage of DirectX repair tool
Mar 15, 2024 am 08:31 AM
The DirectX repair tool is a professional system tool. Its main function is to detect the DirectX status of the current system. If an abnormality is found, it can be repaired directly. There may be many users who don’t know how to use the DirectX repair tool. Let’s take a look at the detailed tutorial below. 1. Use repair tool software to perform repair detection. 2. If it prompts that there is an abnormal problem in the C++ component after the repair is completed, please click the Cancel button, and then click the Tools menu bar. 3. Click the Options button, select the extension, and click the Start Extension button. 4. After the expansion is completed, re-detect and repair it. 5. If the problem is still not solved after the repair tool operation is completed, you can try to uninstall and reinstall the program that reported the error.
 Introduction to HTTP 525 status code: explore its definition and application
Feb 18, 2024 pm 10:12 PM
Introduction to HTTP 525 status code: explore its definition and application
Feb 18, 2024 pm 10:12 PM
Introduction to HTTP 525 status code: Understand its definition and usage HTTP (HypertextTransferProtocol) 525 status code means that an error occurred on the server during the SSL handshake, resulting in the inability to establish a secure connection. The server returns this status code when an error occurs during the Transport Layer Security (TLS) handshake. This status code falls into the server error category and usually indicates a server configuration or setup problem. When the client tries to connect to the server via HTTPS, the server has no
 How to use potplayer-How to use potplayer
Mar 04, 2024 pm 06:10 PM
How to use potplayer-How to use potplayer
Mar 04, 2024 pm 06:10 PM
Potplayer is a very powerful media player, but many friends still don’t know how to use potplayer. Today I will introduce how to use potplayer in detail, hoping to help everyone. 1. PotPlayer shortcut keys. The default common shortcut keys for PotPlayer player are as follows: (1) Play/pause: space (2) Volume: mouse wheel, up and down arrow keys (3) forward/backward: left and right arrow keys (4) bookmark: P- Add bookmarks, H-view bookmarks (5) full screen/restore: Enter (6) multiple speeds: C-accelerate, 7) Previous/next frame: D/
 What is the KMS activation tool? How to use the KMS activation tool? How to use KMS activation tool?
Mar 18, 2024 am 11:07 AM
What is the KMS activation tool? How to use the KMS activation tool? How to use KMS activation tool?
Mar 18, 2024 am 11:07 AM
The KMS Activation Tool is a software tool used to activate Microsoft Windows and Office products. KMS is the abbreviation of KeyManagementService, which is key management service. The KMS activation tool simulates the functions of the KMS server so that the computer can connect to the virtual KMS server to activate Windows and Office products. The KMS activation tool is small in size and powerful in function. It can be permanently activated with one click. It can activate any version of the window system and any version of Office software without being connected to the Internet. It is currently the most successful and frequently updated Windows activation tool. Today I will introduce it Let me introduce to you the kms activation work
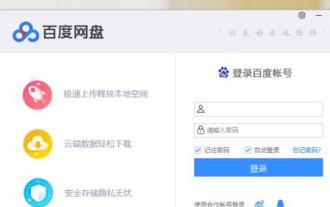 How to use Baidu Netdisk-How to use Baidu Netdisk
Mar 04, 2024 pm 09:28 PM
How to use Baidu Netdisk-How to use Baidu Netdisk
Mar 04, 2024 pm 09:28 PM
Many friends still don’t know how to use Baidu Netdisk, so the editor will explain how to use Baidu Netdisk below. If you are in need, hurry up and take a look. I believe it will be helpful to everyone. Step 1: Log in directly after installing Baidu Netdisk (as shown in the picture); Step 2: Then select "My Sharing" and "Transfer List" according to the page prompts (as shown in the picture); Step 3: In "Friend Sharing", you can share pictures and files directly with friends (as shown in the picture); Step 4: Then select "Share" and then select computer files or network disk files (as shown in the picture); Fifth Step 1: Then you can find friends (as shown in the picture); Step 6: You can also find the functions you need in the "Function Treasure Box" (as shown in the picture). The above is the editor’s opinion
 How to use Xiaoma win7 activation tool - How to use Xiaoma win7 activation tool
Mar 04, 2024 pm 06:16 PM
How to use Xiaoma win7 activation tool - How to use Xiaoma win7 activation tool
Mar 04, 2024 pm 06:16 PM
I believe that many users are using the Xiaoma win7 activation tool, but do you know how to use the Xiaoma win7 activation tool? Then, the editor will bring you how to use the Xiaoma win7 activation tool. For those who are interested in this, please come to the following article Let's see. The first step is to go to "My Computer" after reinstalling the system, click "System Properties" in the upper menu, and check the Windows activation status. In the second step, click to download the win7 activation tool online and click to open it (there are many resources available everywhere). The third step is to open the Xiaoma activation tool and click "Activate Windows permanently". The fourth step is to wait for the activation process to complete activation. Step 5: Check the Windows activation status again and find that the system has been activated.
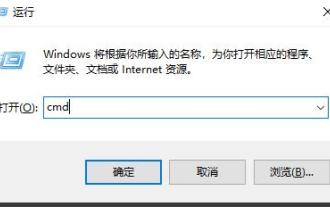 How to correctly use the win10 command prompt for automatic repair operations
Dec 30, 2023 pm 03:17 PM
How to correctly use the win10 command prompt for automatic repair operations
Dec 30, 2023 pm 03:17 PM
The longer the computer is used, the more likely it is to malfunction. At this time, friends need to use their own methods to repair it. So what is the easiest way to do it? Today I will bring you a tutorial on how to repair using the command prompt. How to use win10 automatic repair command prompt: 1. Press "Win+R" and enter cmd to open the "command prompt" 2. Enter chkdsk to view the repair command 3. If you need to view other places, you can also add other partitions such as "d" 4. Enter the execution command chkdskd:/F. 5. If it is occupied during the modification process, you can enter Y to continue.
 What is PyCharm? Function introduction and detailed explanation of usage
Feb 20, 2024 am 09:21 AM
What is PyCharm? Function introduction and detailed explanation of usage
Feb 20, 2024 am 09:21 AM
PyCharm is a professional Python integrated development environment (IDE) developed by JetBrains. It provides Python developers with powerful functions and tools, making writing Python code more efficient and convenient. PyCharm supports multiple operating systems, including Windows, macOS and Linux, and also supports multiple Python versions, and provides a wealth of plug-ins and extension functions to facilitate developers to customize the IDE environment according to their own needs. P
