

How to completely wipe a Mac and reinstall macOS?
Jul 13, 2025 am 12:56 AM
To securely wipe and reinstall macOS, first back up data using Time Machine or cloud services, then enter Recovery Mode based on your Mac’s chip type, use Disk Utility to erase the startup disk with the correct format and scheme, reinstall macOS from the Recovery window, and finally choose whether to set up as new or restore from backup. Each step ensures a clean and secure reset.

If you're planning to sell, give away, or just reset your Mac, doing a complete wipe and reinstalling macOS is the best way to start fresh securely. It's not just about deleting files — you need to erase everything properly and reinstall the operating system from scratch.

Here’s how to do it step by step.

1. Back Up Your Data Before Wiping
Before you even think about wiping your Mac, make sure you’ve backed up all your important data. There are two common ways:
- Time Machine – Connect an external drive and let macOS automatically back up your files.
- Cloud services (like iCloud, Google Drive, etc.) – Upload key documents, photos, and settings if you don’t have an external drive.
If you skip this step, there’s no going back once the drive is erased.


Also, double-check that your backup actually contains what you need. Open the backup drive or log into your cloud account to verify.
2. Enter Recovery Mode to Start the Wipe
To wipe your Mac and reinstall macOS, you’ll need to boot into Recovery Mode. The steps vary slightly depending on your Mac’s chip:
Apple Silicon (M1, M2, etc.):
Turn off your Mac. Press and hold the power button until you see "Loading startup options." Then click Options > Continue.Intel-based Macs:
Restart your Mac and immediately hold downCommand Runtil the Apple logo appears.
Once in Recovery Mode, you’ll get a window with several tools. Choose Disk Utility first.
3. Erase Your Startup Disk Using Disk Utility
Inside Disk Utility:
- Click View > Show All Devices in the top menu.
- Select your main drive (usually labeled “Macintosh HD” or your Mac’s name).
- Click Erase, then choose:
- Format: Mac OS Extended (Journaled) for older macOS versions or APFS for macOS High Sierra and newer
- Scheme: GUID Partition Map (important for Intel Macs)
- Confirm and wait for the process to finish.
This completely removes all data, apps, and user accounts from your drive. Don’t worry if it takes a few minutes — it’s doing a deep clean.
4. Reinstall macOS After Wiping
Once the drive is erased, go back to the main Recovery window and select Reinstall macOS.
Follow the on-screen instructions. You’ll be asked to:
- Choose your Wi-Fi network
- Pick the disk you just erased as the installation target
- Wait while macOS downloads and installs — this can take 30–60 minutes depending on your internet speed
No need to log into an Apple ID unless you want to enable iCloud or App Store features later.
5. Set Up a Fresh macOS Without Restoring (Optional)
After macOS finishes installing, you’ll be greeted with the setup assistant. At this point, you have a choice:
- Set up as a new Mac – Don’t restore from backup if you’re giving it away or starting over.
- Or, if you want your old data back, you can use Time Machine or Migration Assistant to bring things over.
Just remember: once you set up a new user, the wiped state is gone for good (unless you repeat the process).
That’s basically it. A full wipe and reinstall doesn't require any special tools — just patience and a few clicks. It might seem like a lot, but each step is straightforward once you're in Recovery Mode. Just make sure you don’t skip backing up or rush through the erase process.
The above is the detailed content of How to completely wipe a Mac and reinstall macOS?. For more information, please follow other related articles on the PHP Chinese website!

Hot AI Tools

Undress AI Tool
Undress images for free

Undresser.AI Undress
AI-powered app for creating realistic nude photos

AI Clothes Remover
Online AI tool for removing clothes from photos.

Clothoff.io
AI clothes remover

Video Face Swap
Swap faces in any video effortlessly with our completely free AI face swap tool!

Hot Article
Hot Tools

Notepad++7.3.1
Easy-to-use and free code editor

SublimeText3 Chinese version
Chinese version, very easy to use

Zend Studio 13.0.1
Powerful PHP integrated development environment

Dreamweaver CS6
Visual web development tools

SublimeText3 Mac version
God-level code editing software (SublimeText3)
Hot Topics


 pkg file to install on mac?
Feb 20, 2024 pm 03:21 PM
pkg file to install on mac?
Feb 20, 2024 pm 03:21 PM
Preface: Today, this site will share with you the relevant content about installing pkg files on Mac. If it can solve the problem you are facing now, don’t forget to follow this site and start now! The previous version of macos pkg cannot be installed to upgrade the operating system: If your laptop is using an older operating system version, it is recommended to upgrade to the latest operating system version. Because older versions may not support installation of the latest macOS system. Select "Erase" in Disk Utility, then select the Macos extension in the format, do not check the encryption option, and do not select the apfs format, and finally click the "Erase" button to solve the problem of being unable to complete the macOS installation. Drag the application's icon to the file starting with App
 3 tips to easily customize your Mac computer name, host name and Bonjour name
Mar 06, 2024 pm 12:20 PM
3 tips to easily customize your Mac computer name, host name and Bonjour name
Mar 06, 2024 pm 12:20 PM
Many Mac users tend to keep the default name of their device and may never consider changing it. Many people choose to stick with the name from the initial setup, such as "Johnny's MacBook Air" or simply "iMac." Learning how to change the name of your Mac is a very useful skill, especially when you have multiple devices, as it can help you quickly distinguish and manage them. Next, we will teach you step by step how to change the computer name, host name and Bonjour name (local host name) in macOS system. Why should you change your Mac name? Changing the name of your Mac can not only show your personality, but also help improve the user experience: Personalize your Mac: The default name may not be to your taste, change it to a name you like.
 How to set up WeChat Mac to automatically convert voice messages into text - How to set up voice to text conversion
Mar 19, 2024 am 08:28 AM
How to set up WeChat Mac to automatically convert voice messages into text - How to set up voice to text conversion
Mar 19, 2024 am 08:28 AM
Recently, some friends have consulted the editor about how to set up WeChat Mac to automatically convert voice messages into text. The following is a method for setting up WeChat Mac to automatically convert voice messages into text. Friends in need can come and learn more. Step 1: First, open the Mac version of WeChat. As shown in the picture: Step 2: Next, click "Settings". As shown in the picture: Step 3: Then, click "General". As shown in the picture: Step 4: Then check the option "Automatically convert voice messages in chat to text". As shown in the picture: Step 5: Finally, close the window. As shown in the picture:
 3 Ways to Convert HEIC Photos to JPG on Mac
Mar 15, 2024 pm 08:43 PM
3 Ways to Convert HEIC Photos to JPG on Mac
Mar 15, 2024 pm 08:43 PM
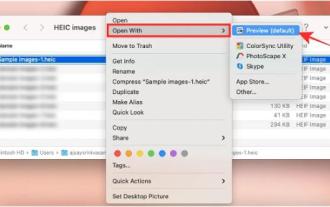
By default, iPhone takes photos from the camera in HEIC format. HEIC stands for High Efficiency Image Container and can hold more pixel data than PNG or JPG files, taking up significantly less space on iPhone storage compared to other formats. These files work best on iPhones but are not widely accepted on the internet because they often result in blurry/grainy pictures when you share them with non-Apple devices. To ensure that HEIC images are compatible on other devices, you may need to convert them to JPG format. This article will introduce how to convert HEIC images to JPG on Mac. How to Convert HEIC Photos to JPG on Mac [3 Methods] Method
 Mac configuration file does not take effect?
Feb 20, 2024 pm 02:00 PM
Mac configuration file does not take effect?
Feb 20, 2024 pm 02:00 PM
Introduction: This article will introduce to you the relevant content about the mac configuration file not taking effect. I hope it will be helpful to you, let's take a look. The solution to the problem that environment variables cannot take effect under Mac. After configuring environment variables in the Mac system, it is found that they are only effective in the current terminal and will become invalid once the terminal is switched. After inquiry, it was found that the Mac system is pre-installed with a tool called ultimate shell-zsh, and the reading of environment variables needs to be set in the .zshrc file. 2. In order for our configuration file to take effect, we can only add the above configuration in .zshrc. If you don’t make the above settings, you will find that it will only take effect every time you source ~/.bash_profile. Re-open z next time.
 MacBook Pro, iMac to get the M4 upgrade later this year followed by MacBook Air in spring of 2025, claims reliable tipster
Jun 25, 2024 am 06:35 AM
MacBook Pro, iMac to get the M4 upgrade later this year followed by MacBook Air in spring of 2025, claims reliable tipster
Jun 25, 2024 am 06:35 AM
Ever since the Apple M4-powered OLED iPad Prolineuparrived, Apple Silicon aficionados have been eagerly awaiting the arrival of the M4 SoC on the Mac lineup. The M4 was undeniably a major leap forward in both compute and graphics performance - leapfr
 How to format a drive using GUID on Mac
Apr 12, 2024 am 09:13 AM
How to format a drive using GUID on Mac
Apr 12, 2024 am 09:13 AM
Formatting the drive of your Mac system is crucial for proper functioning. It helps prevent various system problems and makes your Mac more stable overall. While naturally Mac supports various partitioning schemes, GUID offers more modern and versatile features compared to other options. Also essential for newer Macs and supports larger drives, giving you the best compatibility and stability. This guide will take an in-depth look at how to format a drive using a GUID on macOS. That said, let's get started. Why GUID is important for macOS installation A GUID (full form of Globally Unique Identifier) ??is a partitioning scheme that helps install and run the macOS operating system. It is better than traditional MBR (main lead
 Apple iPhone 16 is no longer pre-installed with Apple Intelligence
Jul 30, 2024 pm 01:18 PM
Apple iPhone 16 is no longer pre-installed with Apple Intelligence
Jul 30, 2024 pm 01:18 PM
According to industry insider Mark Gurman, Apple’s Apple Intelligence will be postponed to October. In other words, it will be pushed first on iOS18.1. Apple iPhone 16 is expected to be released in September, so Apple Intelligence will not be pre-installed. 1. Apple Intelligence Apple Intelligence is a personal intelligence system that uses a powerful generative model to provide new functions for iPhone, iPad and Mac to assist users in communicating, working and expressing. 2. Natural language understanding The large model embedded in Apple Intelligence has a deep understanding of the meaning of language.
