How to install and use Git on Windows 11
May 28, 2023 am 08:08 AM- Click to enter:ChatGPT tool plug-in navigation
Git is one of the most popular version control systems, which allows you to track everything done to a file Changes so that you can easily revert to an earlier version if needed. Git supports having both local and remote repositories, driving collaboration and integrating all changes into a single source.
Prerequisites for installing Git on Windows 11
Before we begin, there are some prerequisites for installing Git on Windows. Here they come:
- Administrator rights for your Windows account
- Access to command line tools (such as CMD or PowerShell)
- Username and password for Git (available Choose)
- Your favorite text editor
- Ubuntu on WSL (if you are installing it)
How to install Git on Windows 11
Since there are several ways to install Git, we will look at each of these methods one by one so that you can understand the steps for installing Git for all the different methods.
Method 1: Install Git from the Git official website
Now, let’s see how to install Git using the traditional method. Here's how to do it:
Step 1: Download Git
The first step is to get the Git installation files. To do this, click on the following link:
Download: Official Git Page
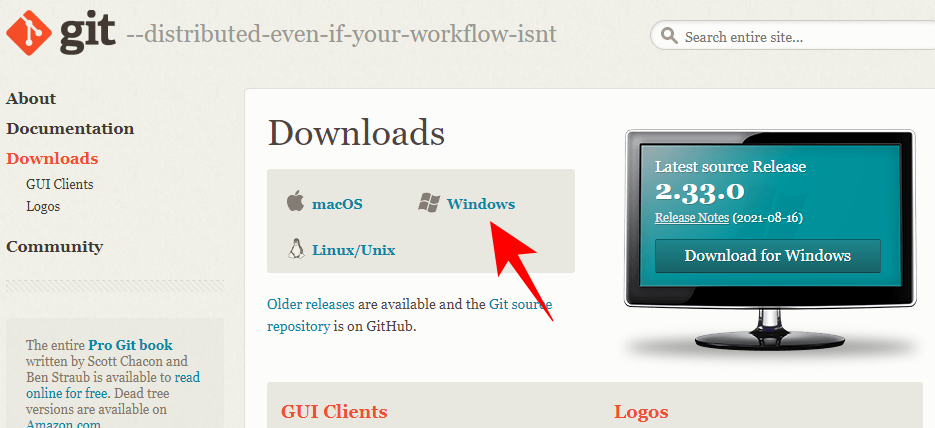
On the download page, click Windows to get the latest installation file.
Step 2: Run the Git Installer
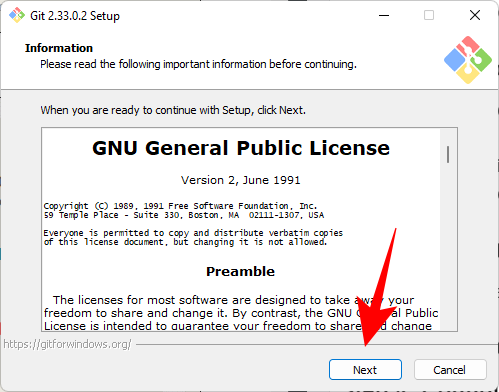
Now, navigate to the downloaded installation file and double-click to run the installer. Click Next.
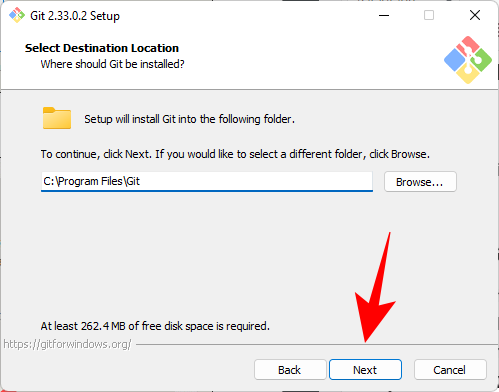
Keep the default installation location and click Next.
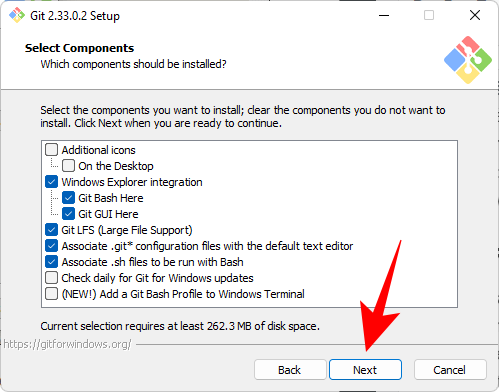
On the next screen you will be able to select the components you want to install. Unless you specifically need to change something, we recommend leaving the options at their default values. Then click "Next".
Click Next again.
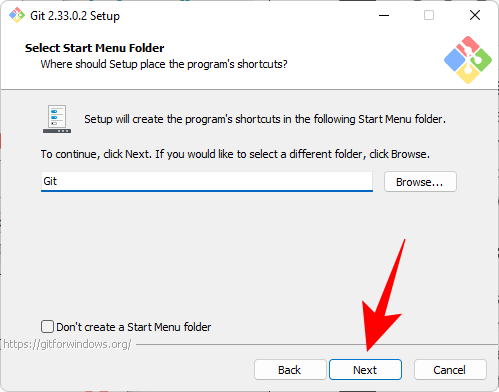
#On the next screen, you have to select the default editor for Git. Click the drop-down menu to do this.
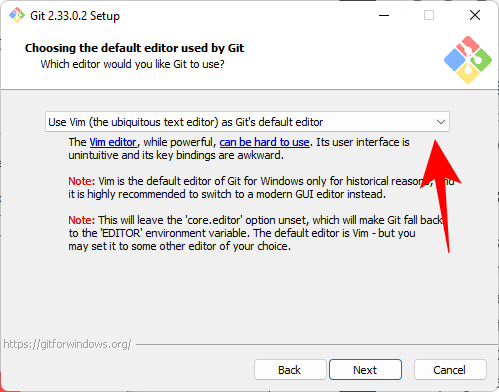
Then select your text editor. We will use Notepad.
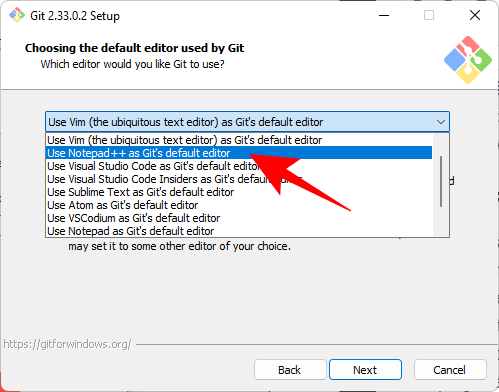
Click Next.
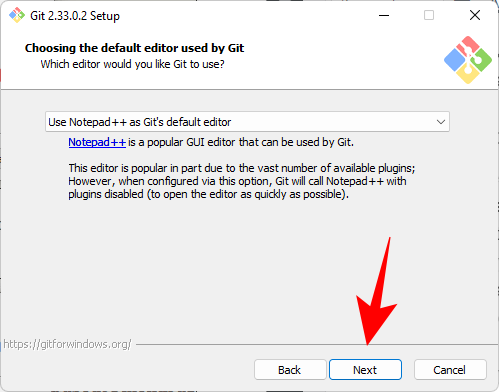
On the next screen you have the option to choose a different name for the initial branch in the new repository. The default name is "master". Stay this way unless you want a different one, then click Next.
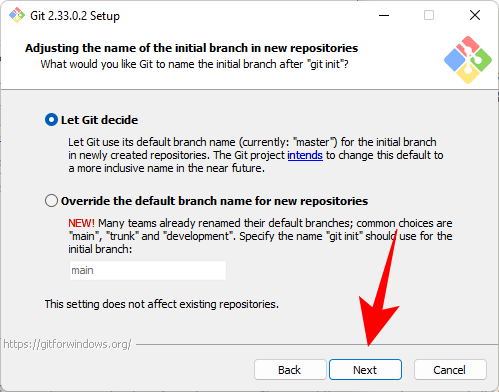
The next step is to add the PATH environment for Git when running commands from command line applications such as CMD and PowerShell. Set it as default and click Next.
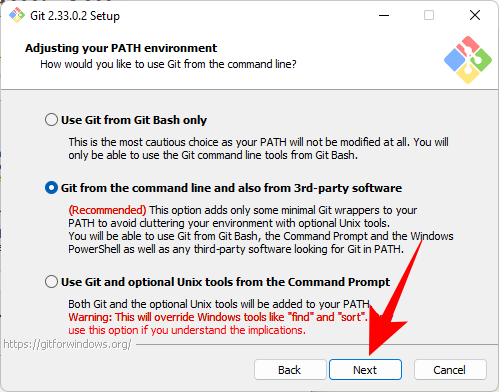
Now, select a Secure Shell client program for use with Git. Since the installer comes bundled with OpenSSH, no changes are required here (unless you want to use external OpenSSH). Click Next.
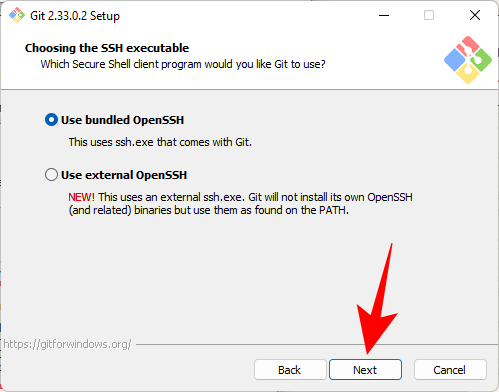
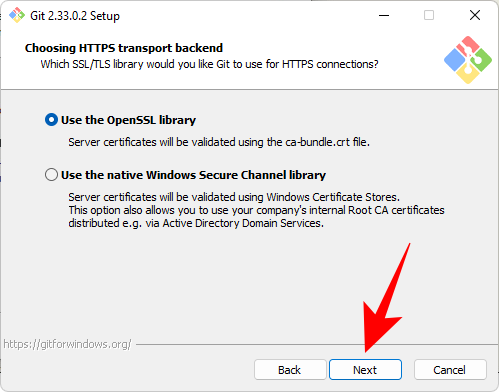
#When selecting a server certificate, we recommend using the default OpenSSL library. Click Next.
This section allows you to configure the end-of-line dialog. Leave it as default and click Next.
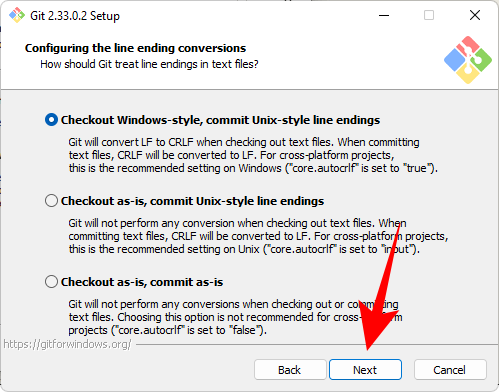
Now select your terminal emulator. Again, we recommend sticking with the default MinTTY. Click Next.
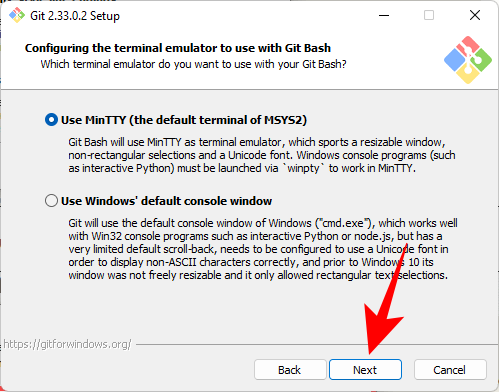
Keep the default behavior of the command git pull. As before, it is recommended to use the default options if you do not want to change its behavior. Click Next.
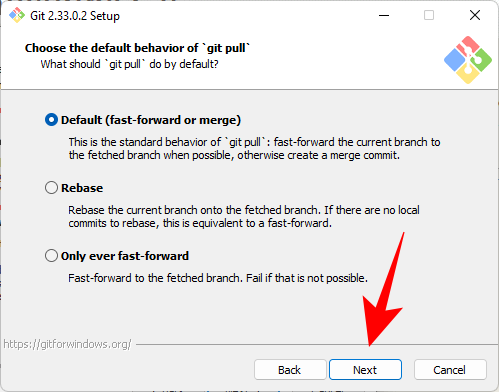
#Now you have to choose a Credential Assistant that helps in getting and saving credentials. Git Credential Manager core (the default selection) is the most stable of the bunch, so just click Next.
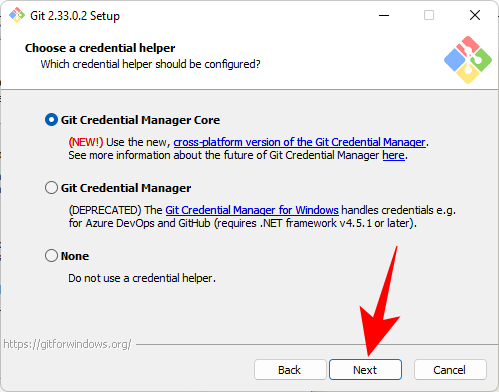
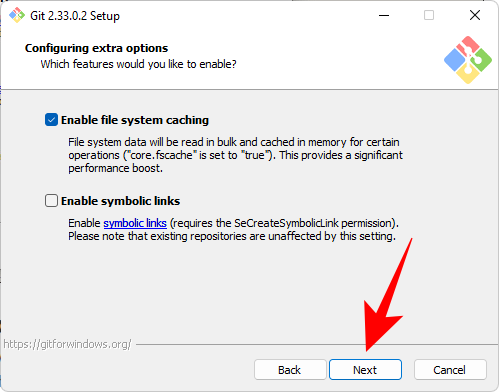
There are some additional configurations. The first option (selected by default) is "Enable file system caching". This is important for certain features and can also significantly improve performance. Another option is "Enable symbolic links" which is similar to a command line shortcut. If you use them, select it, if you don't, leave it. Then click "Next".
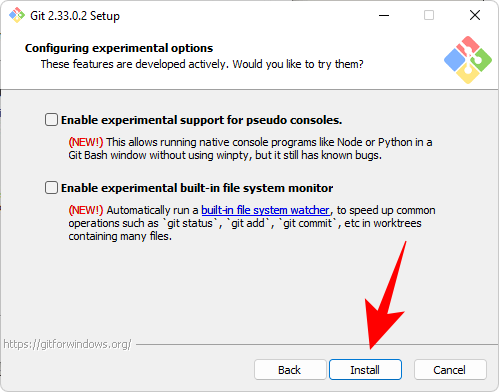
The last few options you get are "Support pseudo-console" and "Built-in file system monitor". These are experimental features under active development. Therefore, we recommend leaving them unchecked unless you want to try them out. Finally, click Install.
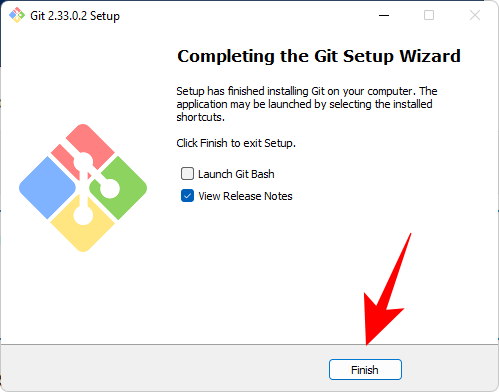
After the installation is complete, click Finish.
Step 3: Check Git version
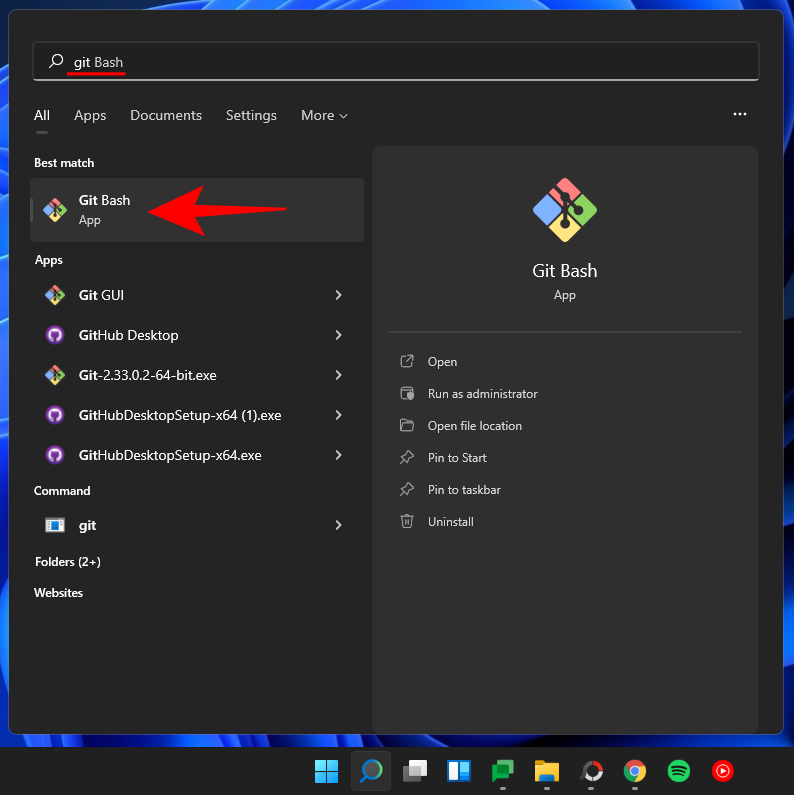
After installing Git, it’s time to check whether Git is installed correctly and its version. To do this, launch Git Bash from the Start menu.
Then type the following command and press Enter:
git --version
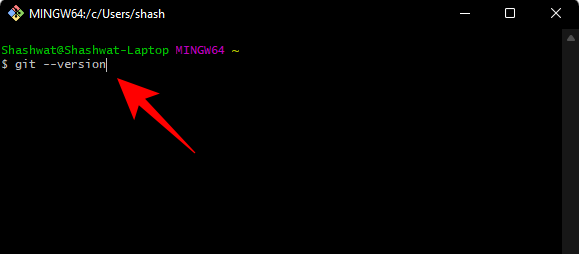
You should see the version of git installed on your PC.

Step 4: Configure Git with username and email
To use Git on Windows 11, you need to enter your credentials for configuration . Here's how you can do it:
Open Git Bash and type the following to add your username:
git config --global user.name "your user name"
Make sure to replace "your username" with your actual username. Then press Enter.

Now type the following command:
git config --global user.email "your email address"
Again, make sure to replace "your email address" with the actual email address associated with your Git account. Then press Enter.

Now, if you want to check the configuration, type the following:
git config --global --list
Then press Enter.
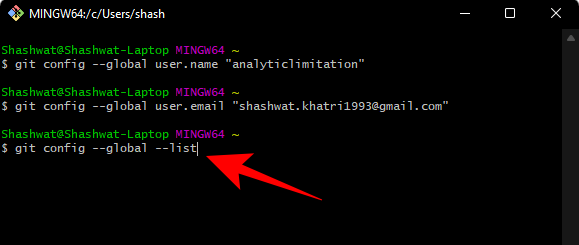
You will see your configuration details.
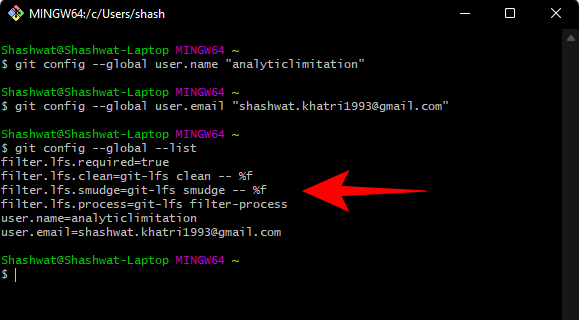
Note: The --global command tells Git to use the information you provide Used for everything you do on the system. If you use --local instead, the configuration will only apply to your current repository .
Method Two: Install GitHub Desktop for Windows 11
If you are looking for a GUI-assisted application to manage your Git repositories and let others collaborate, GitHub Desktop is your friend. Its installation is also a very simple process.
Download: GitHub Desktop
Go to the link above and click "Download for Windows (64-bit)".
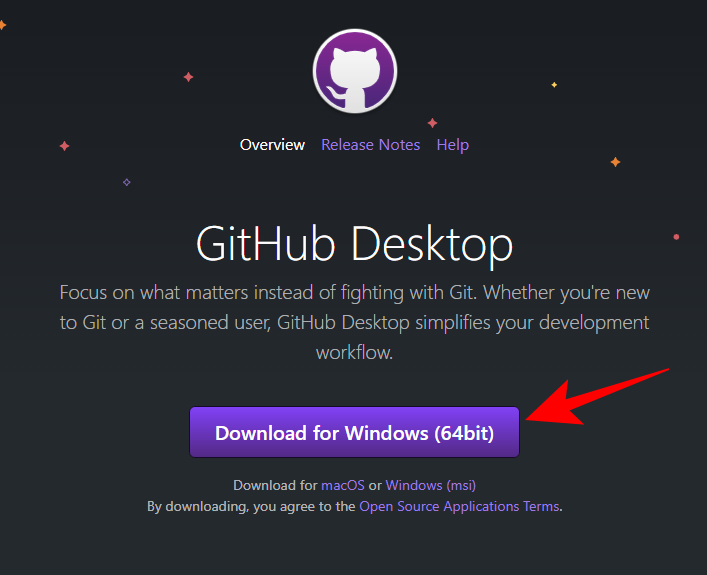
Then run the downloaded installer. This setup does not require any changes and automatically installs GitHub. Once launched, you can choose to log in to GitHub.com. Or you can go ahead and skip this step.
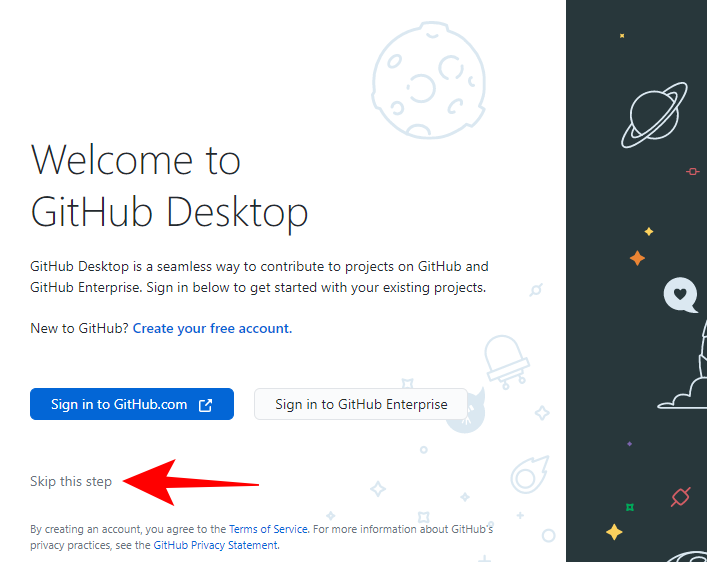
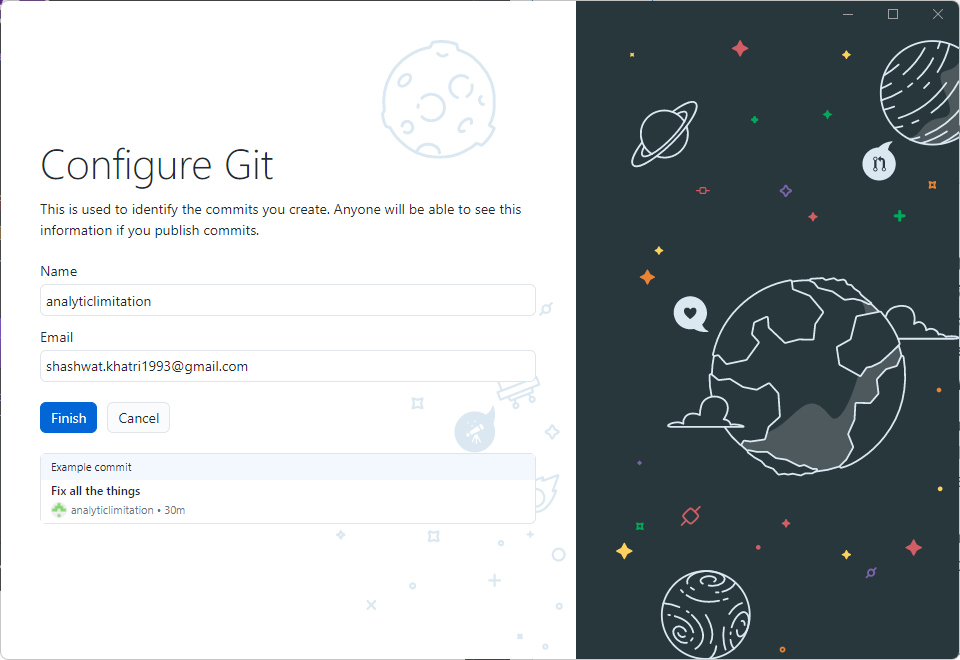
Enter your username and email. Then click Finish.
That's it! GitHub Desktop is now available.
Method 3: Use Git with PowerShell
There is a common misconception that Git can only be used with Git Bash, but in fact it works equally well with PowerShell. But before you can do that, you have to make some additions to PowerShell.
Step 1: Check the Execution Policy
First, you need to set the PowerShell ExecutionPolicy to "RemoteSigned". So, press Start, type powershell, and click "Run as Administrator".
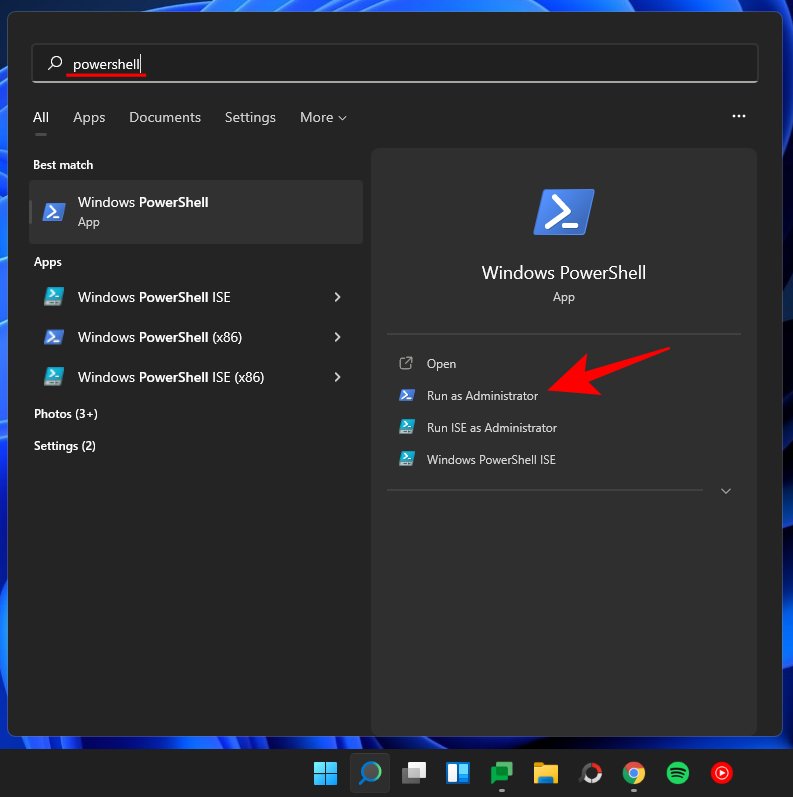
Now type the following command in PowerShell:
Get-ExecutionPolicy
Press Enter.

If you receive the "RemoteSigned" message, then it's already set.

If not, type the following command:
Set-ExecutionPolicy -Scope CurrentUser -ExecutionPolicy RemoteSigned -Force
Then press Enter.

#Now you are ready to install the git module in PowerShell.
Step 2: Add the Posh-git module
To add the Posh-git module, type the following command:
Install-Module posh-git -Scope CurrentUser -Force
and press Enter.

Next, we need to import the module into PowerShell. To do this, type the following command:
Import-Module posh-git
Press Enter.

You may want to ensure that the module is loaded by default. To do this, type the following command:
Add-PoshGitToProfile -AllHosts
Press Enter.

With PowerShell you get the same experience as git, as long as you are in the directory with the git repository.
Method 4: Install Git on Ubuntu WSL
If you already have Ubuntu installed on Windows Subsystem for Linux (WSL), you can also install Git on it. Here's how to do it.
Open the Ubuntu application.
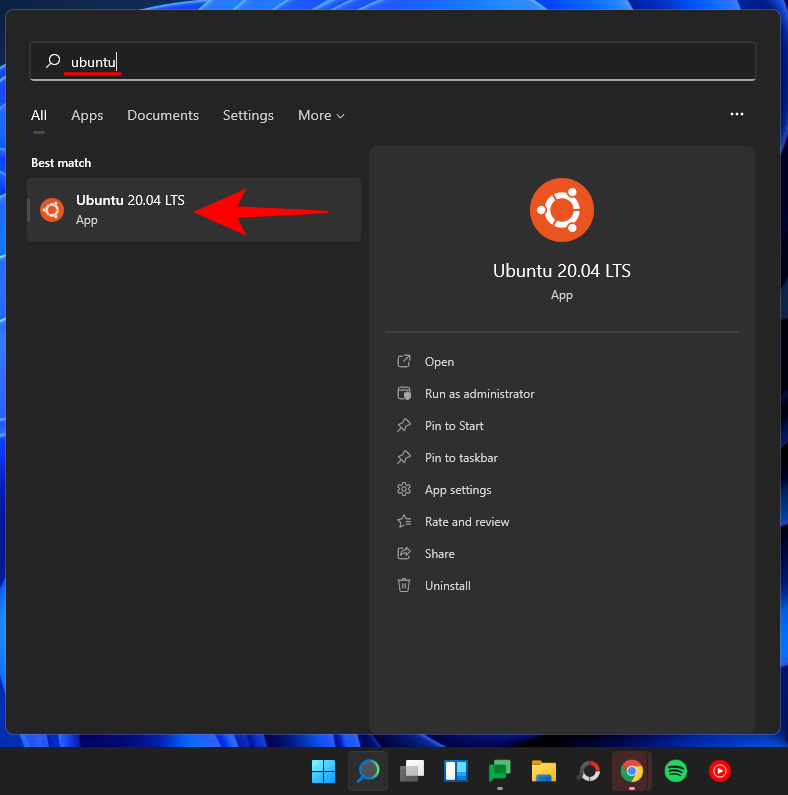
sudo add-apt-repository ppa:git-core/ppa


sudo apt-get update

sudo apt-get install git

When asked for confirmation, type Y and press Enter.
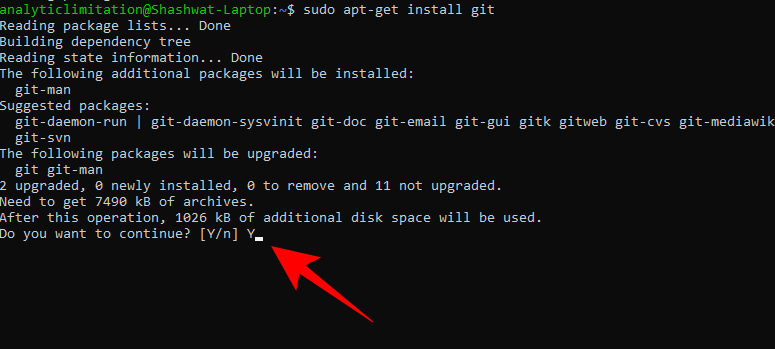
#You have now installed Git on Ubuntu WSL.
Method 5: Use the Winget tool to install Git
There is a little-known tool on Windows 11 called the winget command line tool that allows you to find, install, configure and install Git on your system. Delete the application. It can also be used to install Git on Windows.
Because Windows 11 has pre-installed the winget tool, there is no need to install it separately. Here's how to use it to install Git on Windows:
Press Start, type powershell, then right-click on the best match and select "Run as administrator" ".
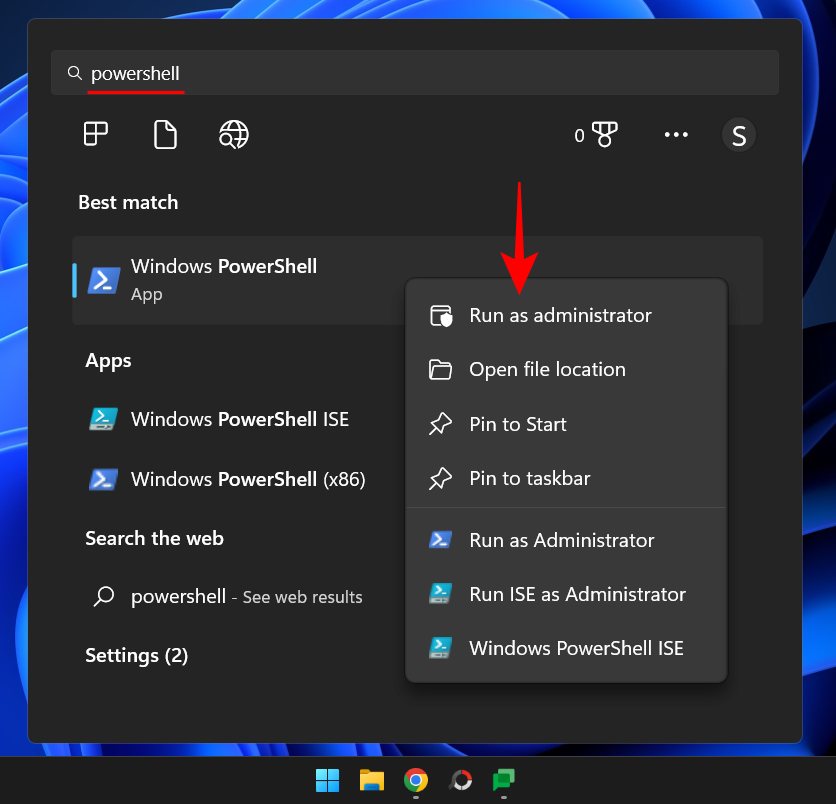
Then type the following command:
winget install --id Git.Git -e --source winget
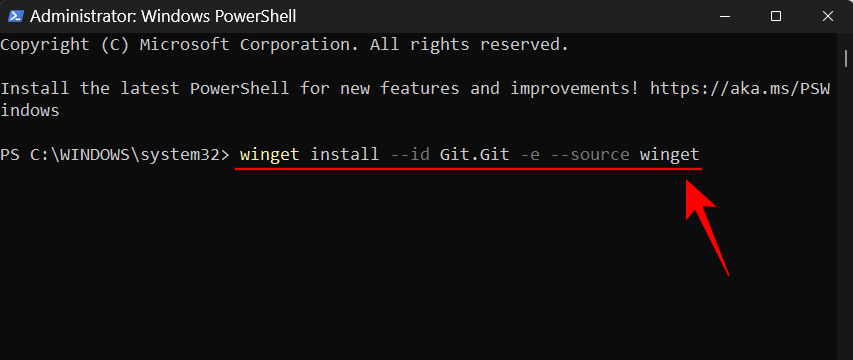
Press Enter.
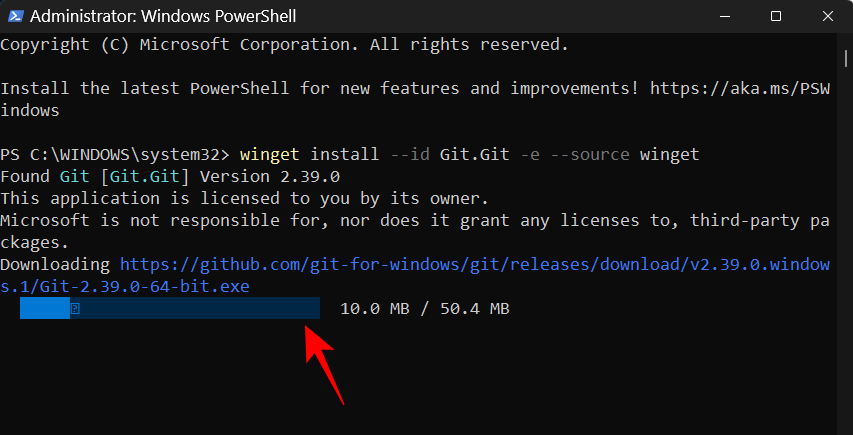
Wait for git to download and install.
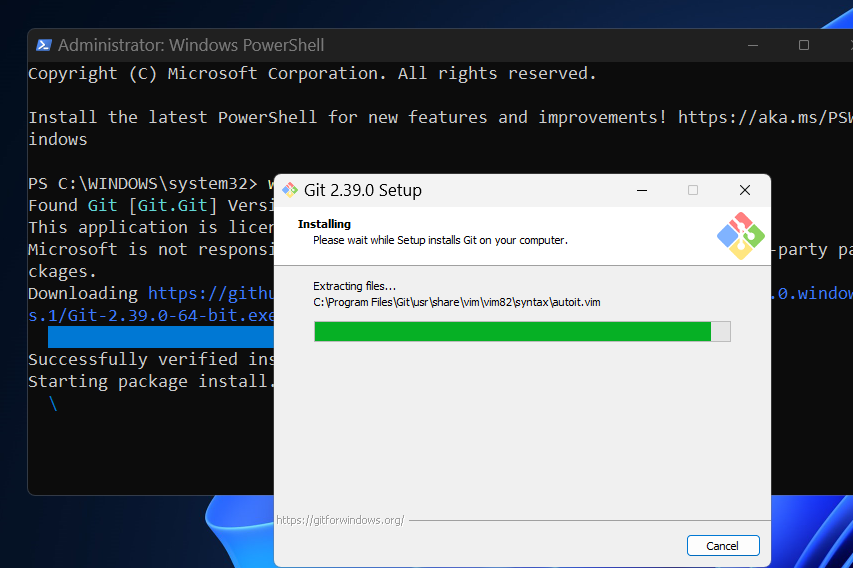
Once completed, you will see the message "Installed Successfully".
How to use Git on Windows 11
Now that we have seen the various ways to install Git on Windows 11, let’s see how to use Git. Here are some things you might want to learn how to use Git:
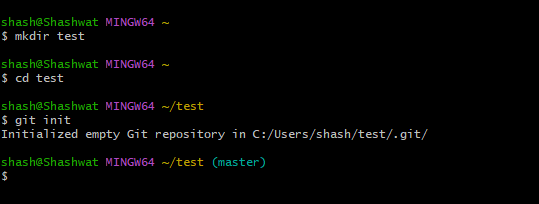
1. Create and initialize a local test directory
To create a new local test directory, enter the following in Git Bash or PowerShell Content:
mkdir test
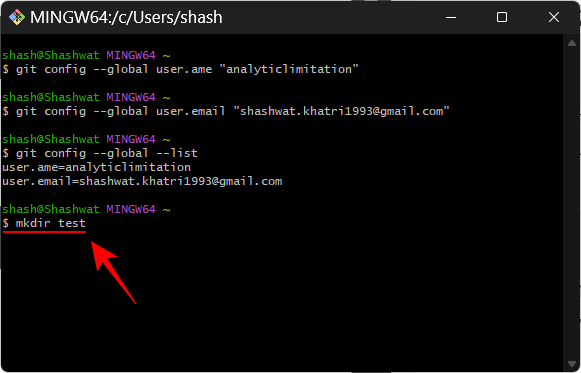
Press the Enter key. If you already have a GitHub repository, type the project name instead of test.
Then, to change directory, type the following:
cd test
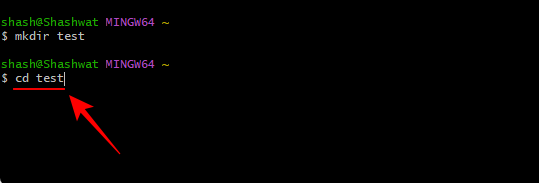
Press Enter . Now, to initialize git in the new directory, type the following:
git init
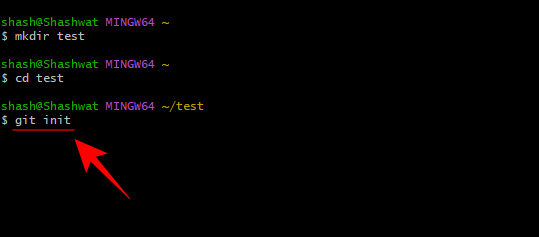
Press enter.
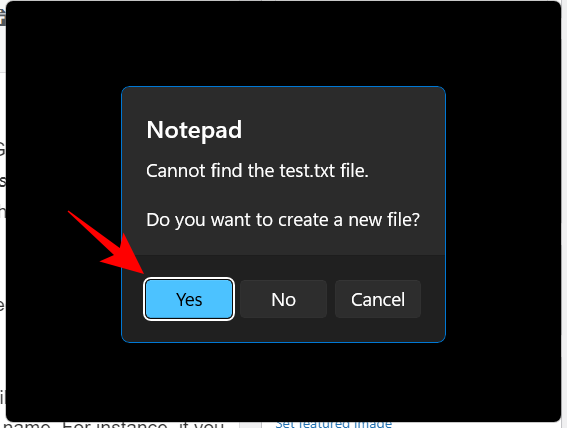
#If you want to add several project files, just enter the full name of the project file. For example, if you wanted to create a text document, you would type the following:
notepad test.txt

Press Enter key. This will open said application.
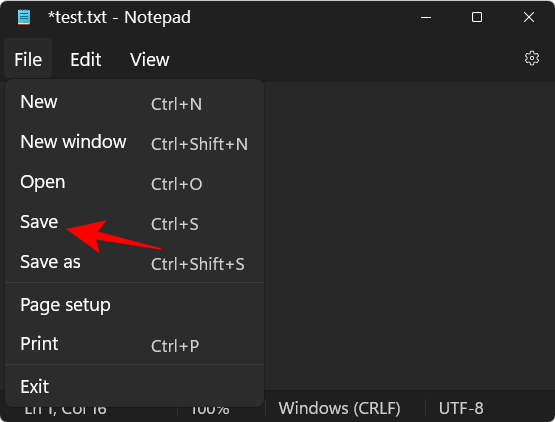
Add relevant content. Then save the file.
You can track your files with the following command and press Enter:
git status
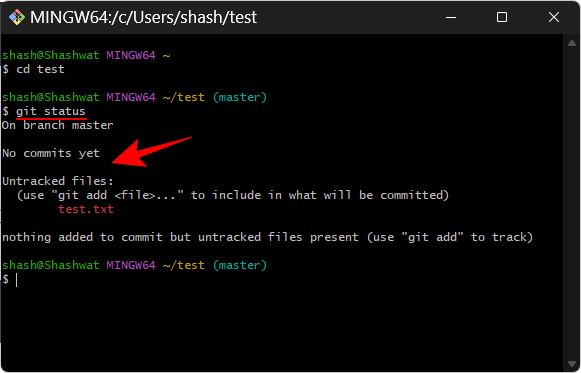
Here you will see that Git recognized our file, but did not find any commits (or saves) to the file, as stated in the message - "No commits yet" and "Untracked files" ".
2. Create a new remote warehouse
First, go to github.com and log in. Then click the " " icon in the upper right corner.
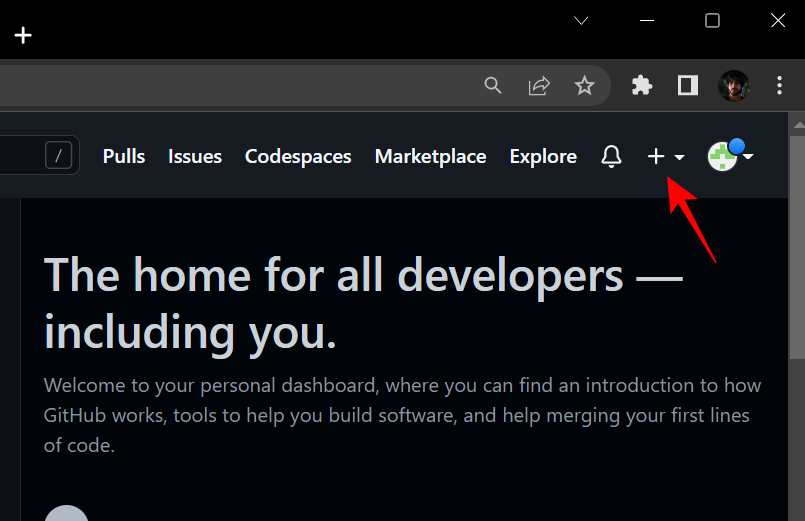
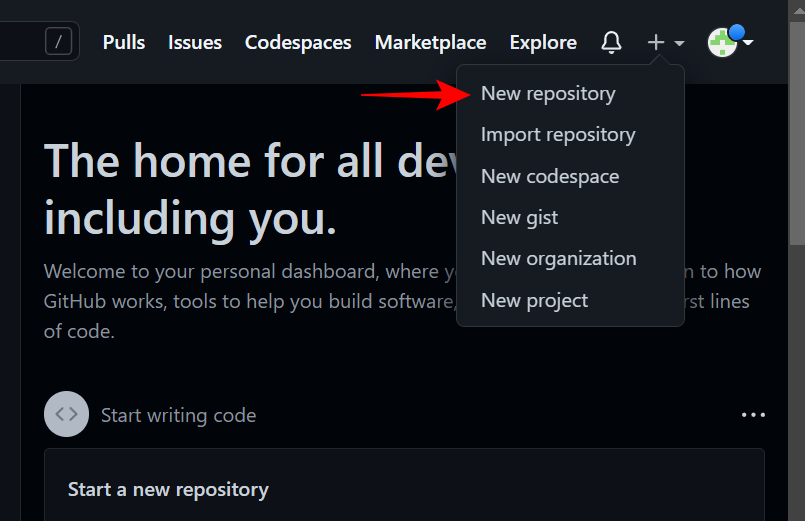
Select Create a new repository.
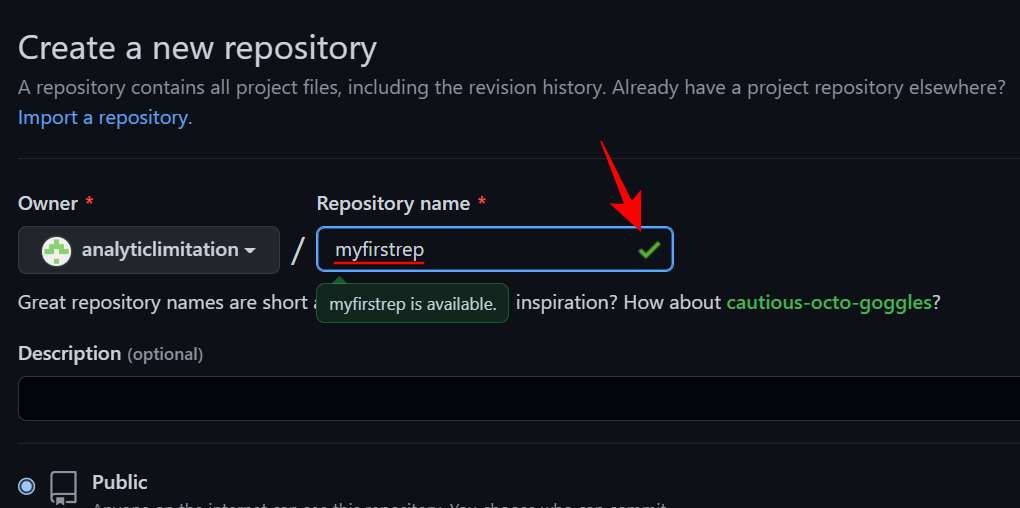
Here, enter a name for the repository under Repository Name. If available, you will get a green checkmark.
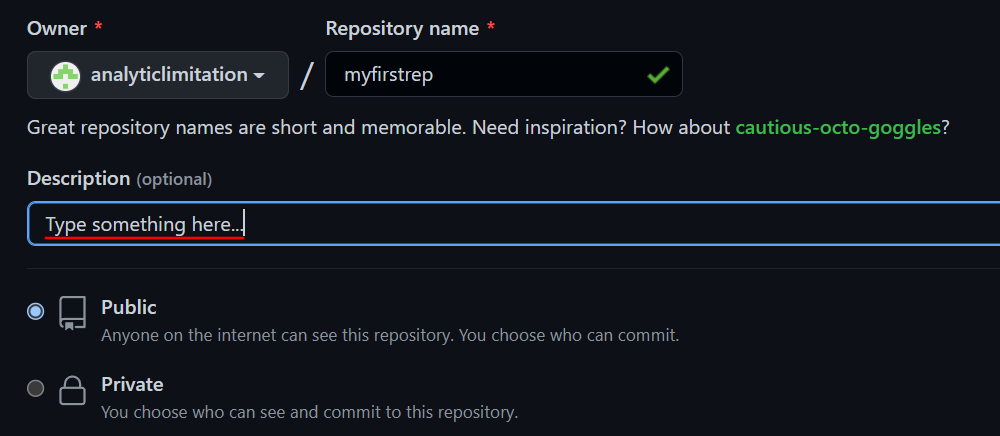
Provide a description for your repository (optional) and choose from Public or Private.
Then click Create Repository at the bottom.
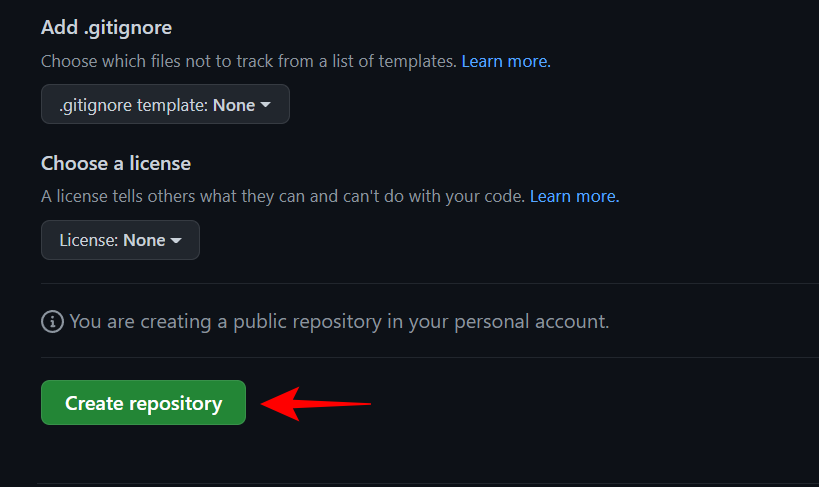
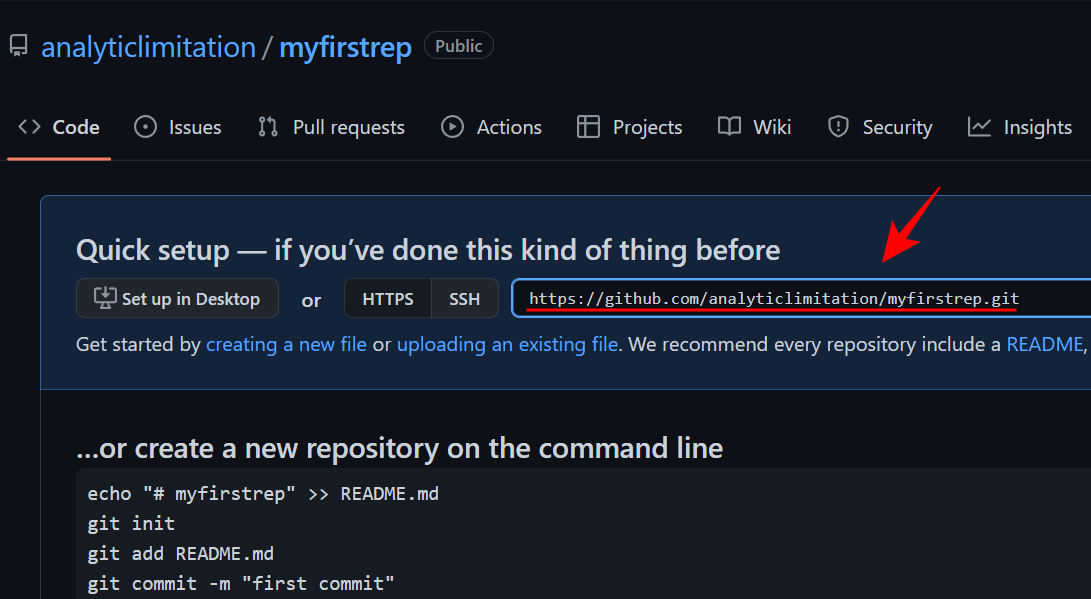
#Your repository is now created. Here, copy the HTTPS URL of the repository.
#3. Use the git commit command to save changes
Using Git, you can submit changes at any time to create a working checkpoint. Think of it as a node that saves the history of your work so that you can look back at those commit checkpoints and see where the code changes started.
But before a change can be committed, it must first be staged. Staging simply means you're ready to commit the file. For our example, we stage to commit the test.txt file. Here is its command:
git add test.txt

Press Enter. For multiple files, type the following:
git add --all
Now, to commit the changes, type the following command:
git commit -m "commit message"
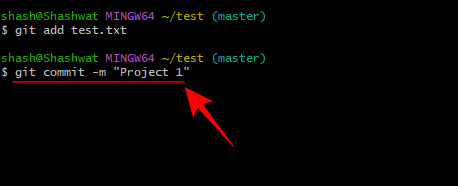
#Replace the words within the quotes with your own short commit message. Then press Enter.
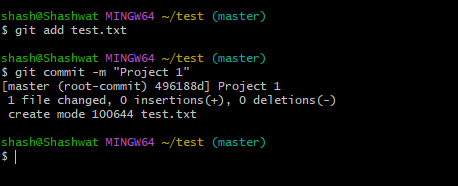
4. Push the local files to the remote repository
Now, let us consider pushing these local files to the remote repository, like the one created earlier That way.
Local files on your system can themselves serve as "clones" of files in the remote repository. All we have to do is switch the source of these files to your remote repository. To do this, follow these steps:
Log in to your GitHub account and go to your repository and copy the repository URL.

Then switch to Git Bash. Then type the following:
git branch -M main
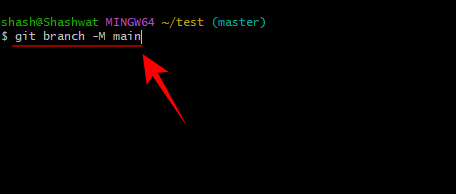
Press Enter.
Then enter:
git remote add origin repository_url
Replace repository_url with the one copied before.

Then press Enter
Do not enter this:
git push -u origin main

Press the Enter key. That's it, your local files are now in your online repository and will now become their primary source.
5. How to clone a GitHub repository
Cloning a GitHub repository is very simple. Go to your remote repository and copy its URL.
After copying the URL of the repository, return to the Git Bash or PowerShell terminal window. Then type the following command:
git clone "repository-url"
Replace repository-url with the copy URL of the repository. Then press Enter.

That’s all!
Frequently Asked Questions (FAQ)
Beginners may find it difficult to install git for application version management and collaboration with others, and it is normal to have questions about this. Here we have addressed some common issues that users usually face when installing git on Windows 11.
Can I use git in cmd?
Installing Git GUI will also install Git Bash and Git CMD. This command line tool is similar to the Windows console but offers better performance in all aspects related to Git.?
What is the difference between local and remote git repositories?
Git repos (short for repository) come in two types - local and remote. A local git repository is a repository that you create and manage locally and exists only on your computer. Its features and functionality are exactly like any other git repository.
On the other hand, the purpose of a remote repository (such as GitHub) is to share your own code and files with the world, allowing others to branch, merge, rebase, etc.
Is installing GitHub the same as installing Git?
Yes, GitHub will also install the latest version of git if you don't have git yet.
The above is the detailed content of How to install and use Git on Windows 11. For more information, please follow other related articles on the PHP Chinese website!

Hot AI Tools

Undress AI Tool
Undress images for free

Undresser.AI Undress
AI-powered app for creating realistic nude photos

AI Clothes Remover
Online AI tool for removing clothes from photos.

Clothoff.io
AI clothes remover

Video Face Swap
Swap faces in any video effortlessly with our completely free AI face swap tool!

Hot Article

Hot Tools

Notepad++7.3.1
Easy-to-use and free code editor

SublimeText3 Chinese version
Chinese version, very easy to use

Zend Studio 13.0.1
Powerful PHP integrated development environment

Dreamweaver CS6
Visual web development tools

SublimeText3 Mac version
God-level code editing software (SublimeText3)
 How do I view the commit history of my Git repository?
Jul 13, 2025 am 12:07 AM
To view Git commit history, use the gitlog command. 1. The basic usage is gitlog, which can display the submission hash, author, date and submission information; 2. Use gitlog--oneline to obtain a concise view; 3. Filter by author or submission information through --author and --grep; 4. Add -p to view code changes, --stat to view change statistics; 5. Use --graph and --all to view branch history, or use visualization tools such as GitKraken and VSCode.
 How do I delete a Git branch?
Jul 13, 2025 am 12:02 AM
To delete a Git branch, first make sure it has been merged or no retention is required. Use gitbranch-d to delete the local merged branch. If you need to force delete unmerged branches, use the -D parameter. Remote branch deletion uses the gitpushorigin-deletebranch-name command, and can synchronize other people's local repositories through gitfetch-prune. 1. To delete the local branch, you need to confirm whether it has been merged; 2. To delete the remote branch, you need to use the --delete parameter; 3. After deletion, you should verify whether the branch is successfully removed; 4. Communicate with the team to avoid accidentally deleting shared branches; 5. Clean useless branches regularly to keep the warehouse clean.
 Can I buy Dogecoin in the currency circle? How to identify scam items?
Jul 10, 2025 pm 09:54 PM
The "Dogcoin" in the currency circle usually refers to newly issued cryptocurrencies with extremely low market value, opaque project information, weak technical foundation or even no practical application scenarios. These tokens often appear with high-risk narratives.
 How do I add a subtree to my Git repository?
Jul 16, 2025 am 01:48 AM
To add a subtree to a Git repository, first add the remote repository and get its history, then merge it into a subdirectory using the gitmerge and gitread-tree commands. The steps are as follows: 1. Use the gitremoteadd-f command to add a remote repository; 2. Run gitmerge-srecursive-no-commit to get branch content; 3. Use gitread-tree--prefix= to specify the directory to merge the project as a subtree; 4. Submit changes to complete the addition; 5. When updating, gitfetch first and repeat the merging and steps to submit the update. This method keeps the external project history complete and easy to maintain.
 How to identify fake altcoins? Teach you to avoid cryptocurrency fraud
Jul 15, 2025 pm 10:36 PM
To identify fake altcoins, you need to start from six aspects. 1. Check and verify the background of the materials and project, including white papers, official websites, code open source addresses and team transparency; 2. Observe the online platform and give priority to mainstream exchanges; 3. Beware of high returns and people-pulling modes to avoid fund traps; 4. Analyze the contract code and token mechanism to check whether there are malicious functions; 5. Review community and media operations to identify false popularity; 6. Follow practical anti-fraud suggestions, such as not believing in recommendations or using professional wallets. The above steps can effectively avoid scams and protect asset security.
 What is Useless Coin? Overview of USELESS currency usage, outstanding features and future growth potential
Jul 24, 2025 pm 11:54 PM
What are the key points of the catalog? UselessCoin: Overview and Key Features of USELESS The main features of USELESS UselessCoin (USELESS) Future price outlook: What impacts the price of UselessCoin in 2025 and beyond? Future Price Outlook Core Functions and Importances of UselessCoin (USELESS) How UselessCoin (USELESS) Works and What Its Benefits How UselessCoin Works Major Advantages About USELESSCoin's Companies Partnerships How they work together
 What is the code number of Bitcoin? What style of code is Bitcoin?
Jul 22, 2025 pm 09:51 PM
As a pioneer in the digital world, Bitcoin’s unique code name and underlying technology have always been the focus of people’s attention. Its standard code is BTC, also known as XBT on certain platforms that meet international standards. From a technical point of view, Bitcoin is not a single code style, but a huge and sophisticated open source software project. Its core code is mainly written in C and incorporates cryptography, distributed systems and economics principles, so that anyone can view, review and contribute its code.
 How to set environment variables in PHP environment Description of adding PHP running environment variables
Jul 25, 2025 pm 08:33 PM
There are three main ways to set environment variables in PHP: 1. Global configuration through php.ini; 2. Passed through a web server (such as SetEnv of Apache or fastcgi_param of Nginx); 3. Use putenv() function in PHP scripts. Among them, php.ini is suitable for global and infrequently changing configurations, web server configuration is suitable for scenarios that need to be isolated, and putenv() is suitable for temporary variables. Persistence policies include configuration files (such as php.ini or web server configuration), .env files are loaded with dotenv library, and dynamic injection of variables in CI/CD processes. Security management sensitive information should be avoided hard-coded, and it is recommended to use.en


