
 Computer Tutorials
System Installation
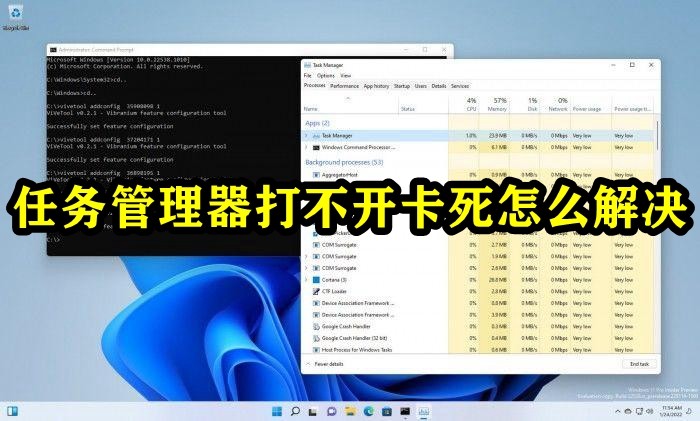
How to solve the problem that the task manager cannot be opened and is stuck
Computer Tutorials
System Installation
How to solve the problem that the task manager cannot be opened and is stuck
How to solve the problem that the task manager cannot be opened and is stuck
Feb 01, 2024 am 10:18 AM
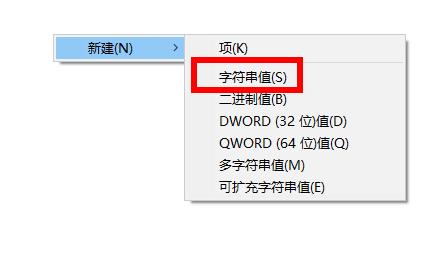
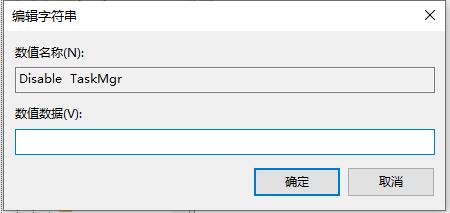
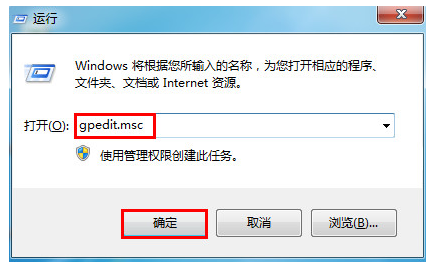
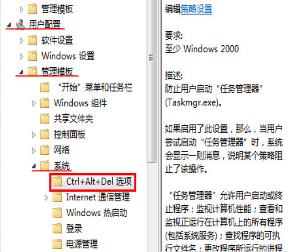
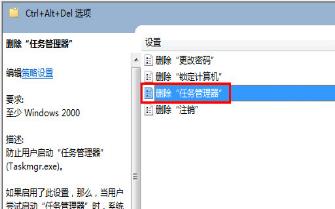
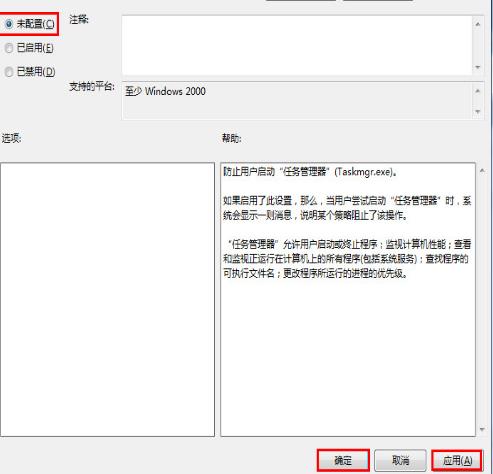
Many friends feel helpless when the computer becomes unresponsive and the task manager cannot be opened. The following editor will bring you several solutions. When the computer memory is insufficient and the program freezes, the program cannot be opened. In this case, you can only press and hold the power button to restart. When the graphics card driver is incompatible and causes the computer to freeze and black screen, you need to restart and enter the startup repair option to perform the last correct configuration, or enter safe mode and disable the graphics card driver


The above is the detailed content of How to solve the problem that the task manager cannot be opened and is stuck. For more information, please follow other related articles on the PHP Chinese website!

Hot AI Tools

Undress AI Tool
Undress images for free

Undresser.AI Undress
AI-powered app for creating realistic nude photos

AI Clothes Remover
Online AI tool for removing clothes from photos.

Clothoff.io
AI clothes remover

Video Face Swap
Swap faces in any video effortlessly with our completely free AI face swap tool!

Hot Article
Hot Tools

Notepad++7.3.1
Easy-to-use and free code editor

SublimeText3 Chinese version
Chinese version, very easy to use

Zend Studio 13.0.1
Powerful PHP integrated development environment

Dreamweaver CS6
Visual web development tools

SublimeText3 Mac version
God-level code editing software (SublimeText3)


 How to check if Windows is activated and genuine
Jul 09, 2025 am 12:54 AM
How to check if Windows is activated and genuine
Jul 09, 2025 am 12:54 AM
1. Check the activation status in the settings; 2. Use the command prompt to check the activation status; 3. Check whether there are watermarks or restrictions; 4. Verify whether the system is genuine. To confirm whether Windows is genuine and activated, first open "Settings" → "System" → "About" → "Activate" to view the status, and it is normal to display "Windows is activated"; secondly, you can run the commands wmic and slmgr with administrator permissions to view the license details; if the desktop has a "Activate Windows" watermark, it means that it is not activated; finally, use "Windows Specifications" to confirm that the system type is retail or OEM version, and use Microsoft's official tools to verify the authenticity of the system.
 How to install Windows on a second monitor setup
Jul 17, 2025 am 02:42 AM
How to install Windows on a second monitor setup
Jul 17, 2025 am 02:42 AM
Connecting a second monitor when installing a Windows system will not affect the installation process, but the following things need to be paid attention to to ensure that the dual screens work normally: 1. There may be only one screen display during the installation process, and the main display device in the BIOS can be adjusted or the interface can be replaced; 2. After the installation is completed, select the display mode through Win P, and adjust the resolution, position and main display in the display settings; 3. If there is a black screen or unrecognizable situation, check the cable, update the driver or enter safe mode to reinstall the driver; 4. When using monitors with different resolutions, set the appropriate zoom ratio and enable the zoom repair option to optimize the display effect.
 How to back up my Mac before a macOS update?
Jul 15, 2025 am 12:33 AM
How to back up my Mac before a macOS update?
Jul 15, 2025 am 12:33 AM
Before updating macOS, you should back up your Mac. 1. Use TimeMachine to make a complete backup, insert the external hard disk and enable automatic regular backup; 2. Manually back up important files to cloud storage or external devices, and give priority to backing up documents, photos, bookmarks and other key information; 3. Create a bootable macOS installation disk for system repair or reinstallation, prepare a 16GB USB disk and run terminal commands to create. Backup can effectively prevent update failure or data loss, and it is more secure to prepare in advance.
 How to create a macOS bootable installer in Windows?
Jul 13, 2025 am 01:10 AM
How to create a macOS bootable installer in Windows?
Jul 13, 2025 am 01:10 AM
Making a macOS bootable installer on Windows is not officially supported, but can be implemented through third-party tools. First, prepare a USB drive above 16GB, macOS installation image (.dmg/.iso) and tools such as TransMac or balenaEtcher; secondly, use TransMac to right-click the USB drive and select "RestorewithDiskImage" to write the image, or use balenaEtcher to select ISO files and target disk to write; finally note that the USB drive must be in GPT format, and install Hackintosh, you also need to manually configure EFI boot and use boot tools to bypass restrictions.
 Fixing the 'Untrusted_Cert_Title' error during macOS installation
Jul 07, 2025 am 01:06 AM
Fixing the 'Untrusted_Cert_Title' error during macOS installation
Jul 07, 2025 am 01:06 AM
To resolve the "Untrusted_Cert_Title" error, you must first make sure to use the official certified installer and create it correctly. Secondly, check whether the system time settings are accurate, then update the firmware and bootstrap, and finally try to install macOS through the network recovery. The specific steps are: 1. Use the official AppStore installer and create a USB installer through Apple tools such as createinstallmedia to avoid manually copying files or using third-party tools; 2. After entering recovery mode, correct the date and time through terminal commands; 3. Check and update the EFI or firmware of the Mac to confirm that the hardware supports the target macOS version; 4. Long press Option Command R to start the network
 How to install macOS on a blank hard drive?
Jul 07, 2025 am 12:32 AM
How to install macOS on a blank hard drive?
Jul 07, 2025 am 12:32 AM
Installing macOS from scratch is not complicated, just prepare the tools and follow the steps. First, prepare a working Mac, at least 16GB USB drive, a stable network connection and sufficient time; secondly, it is recommended to use the createinstallmedia command in Terminal to create a bootable installer; then enter the installation interface through RecoveryMode or USB installer; then use DiskUtility to format the target hard disk as APFS or MacOSExtended; finally follow the prompts to complete the installation process.
 How to properly format a USB for a macOS bootable installer?
Jul 08, 2025 am 01:13 AM
How to properly format a USB for a macOS bootable installer?
Jul 08, 2025 am 01:13 AM
To correctly format the USB to create a bootable installation disk that is recognizable to macOS, use specific formats and partition settings. First make sure that the USB is at least 12GB (16GB or larger recommended) and back up the data; then format the USB to "MacOSExtended(Journaled)" through disk tools and set the partition scheme to "GUIDPartitionMap"; then download the required version of the macOS installer from the MacAppStore; then run the command sudo/Applications/Install\\macOS\\[version].app/Contents/Resources/createins in the terminal
 How to delete downloaded macOS update files to free up space?
Jul 20, 2025 am 02:04 AM
How to delete downloaded macOS update files to free up space?
Jul 20, 2025 am 02:04 AM
To clean macOS update files, you can manually delete the update packages in /Library/Updates and /var/folders, or use the terminal command sudorm-rf/Library/Updates/* to delete them, or use CleanMyMacX, DaisyDisk and other tools to clean up the system cache; however, be careful to confirm that the update has been completed before deletion and keep the necessary files for rollback.
