


Are you unable to play songs from the Apple Music or iCloud Music library on your Mac? If so, are you getting a specific error stating that your computer is not authorized when you try to play something? This is an issue you may run into when you start listening to Apple Music on a new Mac or even Windows PC.
The Music app on the Mac automatically logs you in with the Apple account that you initially used to set it up. While this is good enough for you to browse and stream Apple Music content, you won’t be able to play music that you purchased from iTunes and songs that are stored in your iCloud Music Library. This is because you need to first add your Mac to the list of authorized devices that can play content from your library.
If you’re looking to get rid of this error, you must authorize your Mac to play Apple Music to resolve the issue.
How to Authorize Your Mac to Play Apple Music
Before you go ahead and try to authorize a Mac, make sure you’ve updated your computer to the latest version of macOS. Here’s what you need to do once you’re done:
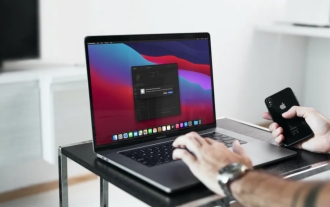
- Launch the stock Music app on your Mac to get started.

- Next, make sure the Music app is the active window and then click on “Account” from the menu bar to proceed.
- This will bring up.a dropdown menu where you’ll have access to a lot more options. Click on “Authorizations” to continue.
- Now, select the option “Authorize This Computer”.
- Doing this will bring up a tiny pop-up window within the Music app. You’ll be prompted to sign in with your Apple account. The in the password and click on “Authorize” to confirm.
- Now, you’ll get a message on your screen saying that your Mac has been authorized. You’ll also be shown how many devices you’ve authorized to play iTunes content in total.


There you go. It’s that easy to authorize your Mac and there’s nothing to worry about as long as you have access to your Apple account.
Once authorized, your Mac will not only have access the content that’s available on Apple Music, but also the music that you purchased and downloaded from the iTunes Store along with all the songs that you’ve added to your iCloud Music Library.
Some users may fail to authorize their Macs since they’ve reached the limit for the maximum number of authorized computers. You’re only allowed to have 5 authorized computers at any given time. Therefore, if you get this error, you’ll need to deauthorize all your other computers first before you can authorize your Mac. Note that you can only do this once a year.
You cannot exactly select the computers that you want to deauthorize from your Mac. But, once deauthorized, you can still reauthorize the other computers that you still use and need by following the steps above. The procedure is fairly similar on Windows PCs as well, except that you’ll be using iTunes instead of the Music app.
Hopefully, you were able to authorize your Mac easily without having to go through any additional trouble. How many computers have you authorized so far? Share your experiences with us and let us know your personal thoughts and feedback in the comments section down below.
The above is the detailed content of How to Authorize Your Mac to Play Apple Music. For more information, please follow other related articles on the PHP Chinese website!

Hot AI Tools

Undress AI Tool
Undress images for free

Undresser.AI Undress
AI-powered app for creating realistic nude photos

AI Clothes Remover
Online AI tool for removing clothes from photos.

Clothoff.io
AI clothes remover

Video Face Swap
Swap faces in any video effortlessly with our completely free AI face swap tool!

Hot Article
Hot Tools

Notepad++7.3.1
Easy-to-use and free code editor

SublimeText3 Chinese version
Chinese version, very easy to use

Zend Studio 13.0.1
Powerful PHP integrated development environment

Dreamweaver CS6
Visual web development tools

SublimeText3 Mac version
God-level code editing software (SublimeText3)


 How to Remove Old Devices from Apple ID on Mac
Jul 07, 2025 am 09:08 AM
How to Remove Old Devices from Apple ID on Mac
Jul 07, 2025 am 09:08 AM
If you've owned multiple Apple devices over the years, you might find yourself in a situation where some of those older Macs, iPhones, iPads, or other Apple hardware have been sold, given away, or traded. No matter how they left your possession, it's
 How to use a Windows keyboard on a Mac
Jul 08, 2025 am 12:12 AM
How to use a Windows keyboard on a Mac
Jul 08, 2025 am 12:12 AM
When typing on a Mac using a Windows keyboard, the Win key corresponds to the Command key and the Alt key corresponds to the Option key; 1. Understand the key mapping: The Win key replaces the Command key for commonly used shortcut keys such as Command C/V, the Alt key replaces the Option key for special symbol input, and the right Alt key may be mapped to Control or other functions; 2. Adjust the keyboard mapping can be customized through system settings or third-party tool Karabiner-Elements; 3. In terms of function keys and multimedia key support, the F key needs to be used with the Fn key, the default brightness and volume function can be adjusted, and some brand shortcut keys are incompatible and need to be customized; 4. Common shortcut key comparison includes copy and paste.
 How to change the default mail app on Mac
Jul 13, 2025 am 01:41 AM
How to change the default mail app on Mac
Jul 13, 2025 am 01:41 AM
The default mail application of Mac can be changed to Outlook, Spark and other clients. The specific steps are as follows: 1. Open "System Settings" or "System Preferences" and enter the "Default Application" section; 2. Select the target mailbox application in the "Email" column; 3. If the target application is not displayed, check whether it supports mail protocol binding, try to restart the application or update the version; 4. Test whether the change is effective, click the web email link to confirm whether the pop-up application is the target client. Complete the above steps to successfully switch the default mailbox.
 How to Reopen Closed Tabs on Mac? How to Restore Them on macOS?
Jul 08, 2025 am 09:41 AM
How to Reopen Closed Tabs on Mac? How to Restore Them on macOS?
Jul 08, 2025 am 09:41 AM
To reopen closed tabs on Mac, launch Safari and navigate to the History menu. Then select either Reopen Last Closed Tab, Reopen Last Closed Window, or click on Recently Closed to restore all tabs from your previous browsing session.Common reasons to
 See Sports Scores in the Mac Menu Bar with MenuScores
Jul 12, 2025 am 09:27 AM
See Sports Scores in the Mac Menu Bar with MenuScores
Jul 12, 2025 am 09:27 AM
For Mac users who are also sports enthusiasts, there’s a handy little free application known as MenuScores. This app displays the game of your choice directly in the menu bar, making it easy to monitor scores or upcoming game times with just a glance
 Contacts App Missing All Contacts on Mac? Here’s the Fix
Jul 12, 2025 am 09:31 AM
Contacts App Missing All Contacts on Mac? Here’s the Fix
Jul 12, 2025 am 09:31 AM
Some Mac users have noticed that their Contacts app occasionally loses all contact information, leaving the entire address book empty. While this situation is definitely concerning, there's a bright side — in most cases, it’s an easy fix, and your co
 How to share my Mac's screen
Jul 14, 2025 am 01:18 AM
How to share my Mac's screen
Jul 14, 2025 am 01:18 AM
To share your Mac screen with others, you can choose the appropriate method according to different scenarios. First, through video conferencing tools such as Zoom, click the "Share" button to select the screen or a specific window for sharing; second, use Messages or FaceTime to initiate a screen sharing session, click the " " to select "Screen Sharing" and invite the other party to view or control it; third, use the "Screen Sharing" App that comes with the system to enable this function on the target Mac and connect to the server address through Finder to achieve remote access; in addition, you need to pay attention to details such as permission settings, privacy protection and network performance impact.
 How to Move Files from Mac to External Hard Drive? How to Transfer Them?
Jul 12, 2025 am 09:25 AM
How to Move Files from Mac to External Hard Drive? How to Transfer Them?
Jul 12, 2025 am 09:25 AM
How to transfer files from Mac to external hard driveWhen moving files, you physically remove them from their original location. Copying files, meanwhile, preserves the original file location—pasting a second version to
